

I am in the process of finishing the interior of my garage and have been researching how to make it more energy efficient. If you are wondering what you can do to improve your garage’s energy efficiency, stay with me. I’m going to share everything I’ve learned from my studies on this.
The key to making
Let’s delve into exactly what you can do to improve the energy-efficiency of your garage. But first…
Why Make A Garage Energy Efficient?
There’s an argument to be made that a garage is not conditioned airspace and therefore does not need to be a focus of an energy-efficiency strategy. After all, energy conservation in the home is all about air-sealing and reinforcing the thermal envelope of the structure. It’s a valid argument but there are certain reasons you may want to spend a weekend or two making your garage more energy efficient.
- Condensation – If you are having issues with condensation in your garage, making the space more energy efficient could help reduce the moist air that settles on the concrete floor. A dehumidifier is a common solution to this but if the structure is full of air leaks then you will be spitting into the wind. Click here to read more about condensation in a garage and how a dehumidifier may help.
- Pests – I had three snakes enter my garage last summer. That was enough for me to realize that I needed to take action. I also had a mouse in the garage (I think that is why the snakes kept coming in). All of those cracks and crevices that let air through also allow unwelcome little squatters that want to turn your garage into their new home.
- Radiant Heat – A garage can get very hot in the summer (or very cold in the winter). Those outdoor temps can radiant into the home if the adjoining walls are not properly insulated and air-sealed.
If any of these apply to your garage, then let’s get to work making it more energy efficient!
Air Seal Gaps and Cracks

If this is a new concept for you, I suggest you read Common Questions On Air-Sealing A Home. The gist of it though is this: conditioned air leaks out of your house through cracks and holes, resulting in higher energy costs.
At the same time, hot or cold outside air can leak in, making your home drafty and less comfortable. We solve this issue by properly air sealing around corners, light fixtures, anywhere we can find a potential break in the thermal barrier of the structure.
Insulated Walls First!
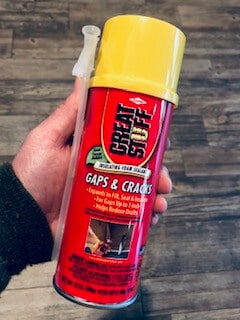
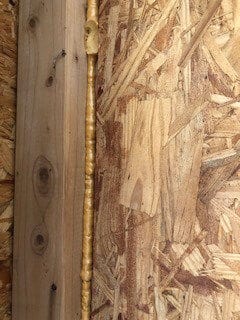
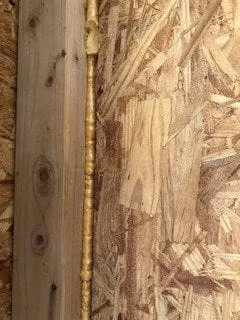
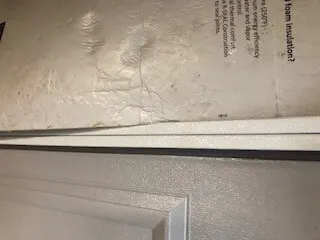
In the garage, we’ll want to focus first on any walls adjoining the conditioned space. Check high and low, watching for any cracks or seams. A mildew resistant caulk can be used for small cracks but larger holes may require an expanding foam like Great Stuff.
Corners are important, too. Since we are preparing to go over the existing OSB with new siding in our garage, I took the time to spray foam there as well. You could use caulk or a clear silicone if you weren’t planning an upgrade. The goal is just to air seal those cracks and seams!
Pay particular attention to the door into the house. If the weatherstripping is showing signs of wear, replace it. And don’t forget to check the bottom of the door. This is a common area for unconditioned air (and pests) to enter. Install a bottom door seal to put an end to it!
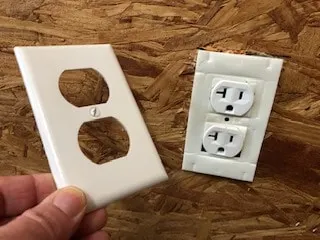
One more area to check on walls adjoining conditioned space is the electrical outlets. The holes behind these outlets where the wires are routed allow air to flow into the walls. I used these wall plate insulation gaskets in my garage to quickly put a barrier between the outside air and the conditioned space inside.

Exterior Walls
Once we’ve addressed the walls that adjoin conditioned space, it’s time to focus on the uninsulated walls. Don’t overlook this step. Your exterior walls are going to be one of the primary ways that snakes and other critters find their way into your garage (next to the garage doors which we will address next).
Take the time to run a thin bead of caulk or expanding foam spray anywhere you can see materials joining. My exterior wall was unfinished when I began this project so I made sure to air-seal along the bottom plate inside the wall as well as the seams where the exterior sheets of OSB meet. If you have pipes exiting through the wall, make sure they are sealed as well.
Recommended Reading: OSB Versus Sheetrock In A Garage: Pro, Cons, And Fire Code
Garage Doors
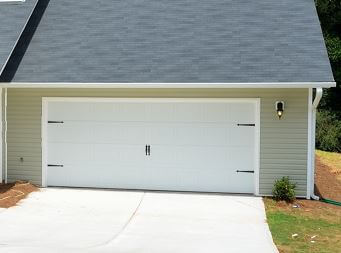

If there is one area where garages are flawed by design in regards to energy efficiency, it is in the garage doors. They are usually thin and made of metal or aluminum and filled with seams. If you hold your hand against the inside of a garage door on a hot or cold day you can feel the outside temperature radiating through it!
I’ve spent a lot of time researching the best way to deal with this. What I’ve found is that the recommended solution is actually surprisingly simple.
How To Make Garage Doors More Energy Efficient
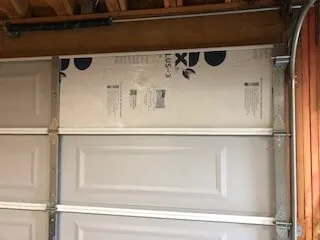
The most practical and cost-efficient approach to improving the energy efficiency of garage doors is to use foam insulation boards that include a radiant foil barrier on it. The radiant barrier is really the key to this more than the foam insulation. Although it does provide a certain
Home Depot sells a 5 pack of 2-foot by 4-foot foam insulation boards that
I had a few foam insulation boards left over from another project so I just took advantage of what I had on hand.
Making DIY Garage Door Insulation Panels
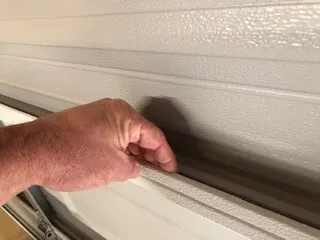
All you do is take a box cutter or sharp knife and cut them to fit within the folds of your garage’s door panels. These folds essentially provide a lip to hold the foam board.

Measuring is important as you will want to ensure that you measure the full height of the panel inside the lip. This will give you a measurement to cut the foam board so that it sits securely in the garage door panel.

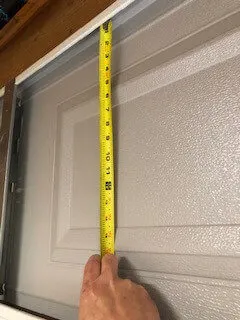
You will also need to measure the width and get it as close as you can so that it can be slid into place.
There are two key tricks to making this work. First, you need to cut the foam height a little long so that you can bend the foam as you insert it into the folds. This will keep the foam in place so that it can’t fall out.
Measure the foam based on on your door panel measurements and cut it using a box cutter. I used a piece of wood as a straight edge but it really doesn’t have to be perfect since part of the cut will be hidden behind the door lips.
Installing the first panel was a little tricky. The key is to push it under the top lip and bend it slightly as you push it into the bottom lip.
Once you finally get it in though, you realize that it is not going anywhere. The lip around the door panel holds it in place.
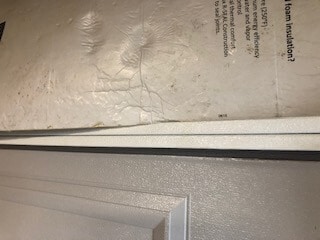
The foam panels that I had on hand were only foil-backed on one side. In looking at the first one, I realized that I might want to put some money into buying new, double foil-backed sheets. I’m not sure that it would provide extra radiant heat protection but I think it would look better.

In the end, using either would be effective. Certainly a better solution that leaving the sun baking on the garage doors with no protection between them and the garage.
The final step, not required but recommended, is to use some double-sided tape to secure the foam to the lips of the garage door panels. I have seen multiple videos and websites that recommend you secure the foam to the garage panel itself. This is wrong!
Radiant barrier requires an air-gap to work effectively. If you tape the foil backing of the foam directly to the the garage panel, you are eliminating the air gap and allowing conductive heat flow.
By securing the foam panel to the inside fold of the garage panel at the top and bottom, you are allowing an air-gap between the garage door and the foil. This will greatly reduce the amount of radiant heat that is transferred into the garage.
Want to reduce air infiltration even more? Learn how to seal a garage door effectively.
What About The Ceiling?
Dealing with the ceiling is a little different. Of course, you want to air-seal any cracks or seams. But what you do from there is going to depend on whether or not you have a conditioned space above the garage such as a bonus room. If you do, then, hopefully, the space between the garage ceiling and bonus room floor is insulated. If not, that needs to be addressed!
Assuming there is no conditioned space above the garage, you will want to consider adding a radiant barrier to space above the garage. I spent over 16 hours researching and reviewing studies on the effectiveness of a radiant barrier.
What I found was that, although the level of effectiveness varied from study to study, each showed that a radiant barrier offered at least some level of heat transfer reduction. Since a garage is so prone to heating up in the summertime, adding a radiant barrier is probably a worthwhile investment.
Insulating Above The Garage
Should I insulate the attic above my garage? Unless you are conditioning the airspace in your garage, you should not insulate the attic or exterior walls of a garage. Insulating an area that is not conditioned can increase the risk of mildew growth.
You can still reduce heat transfer with a radiant barrier though and should seriously consider that option.
The reason for this is that the garage is not part of the thermal envelope. Even if you do insulate the attic and exterior walls, you will still have significant heat gain and loss from the garage doors. That money is better spent in the conditioned air space with additional insulation and air-sealing.
Lighting
When we built our house, I purchased these LED workshop light strips that look like the old fluorescent lights. What’s really great about these is, 1) they turn on instantly, and 2) they don’t flicker. Yes, they cost a bit more up front but I’ve had them in my garage since 2016 with zero issues.


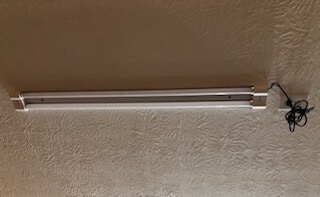
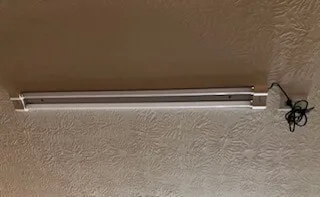
Whatever lighting solution you choose for your garage, I recommend using LEDs. You can’t tell from the picture but the lighting is warmer than the bright white lighting of those old florescent lights. And the fact that it doesn’t flicker is defintely a plus!
Conclusion
You can significantly improve the energy efficiency of your garage while reducing pest invasion. These are simple steps that can be done over a weekend or two as a DIY project. Since I am always looking for ways to increase the energy efficiency of my home, this was a worthwhile investment of time for me.
Related Questions
How To Keep Garage Floor From Sweating? The most effective way to reduce sweating or condensation on a garage floor is to install a dehumidifier. The moisture results from warm, moist air contacting the cold concrete. A floor sealant can reduce condensation buildup on the floor but there will still be humidity in the garage which can cause mold and
Read this post to learn what causes condensation in a garage and how a dehumidifier can resolve the issue.
How Can I Make My Home More Energy Efficient? The three primary ways to improve energy efficiency in a home include 1) air-sealing cracks and seams, 2) increase insulation, and 3) install a radiant barrier.
I’ve written an extensive guide on conducting your own FREE home energy audit. Click here for the guide including a free downloadable worksheet.
Why are rats coming in my garage? Read this post to learn exactly what those rodents are after and what you can do to prevent it.
Why are snakes coming into my garage? This post outlines the primal motivations that are drawing snakes into your garage and what you need to do to make sure you never encounter this again!
As a homeowner, I am constantly experimenting with making the structure of my house more energy-efficient, eliminating pests, and taking on DIY home improvement projects. Over the past two decades, my family has rehabbed houses and contracted new home builds and I’ve learned a lot along the way. I share my hard-learned lessons so that you can save time and money by not repeating my mistakes.
Leave a comment
You must be logged in to post a comment.