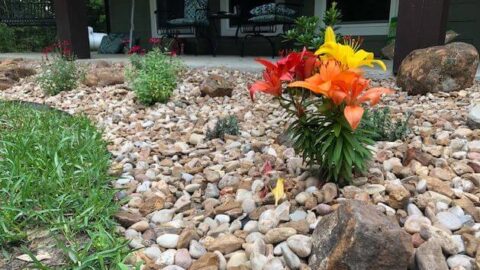

When my wife decided she wanted a large flower bed along the front porch, I was worried that we would have standing water in the front yard. I’d addressed standing water issues previously by installing a french drain in the yard so I wasn’t ready to create another issue.
I did some research and learned a lot about properly managing water drainage in these situations.
There are two approaches to adding drainage to a flower bed. The first is to raise the beds so that water cannot settle around the plants. The second is to route the water away through the use of trenches or an underground pipe such as a french drain. This second approach not only keeps excess water away from the plants but also effectively prevents standing water in the flower bed.
Here’s my experience with adding a french drain system to our new flower bed and what I learned along the way.
Video Proof Of The Effectiveness Of This Flower Bed Drainage Approach
Talk is cheap. Before we go through the process I used to prevent standing water in my flower bed, here’s a short video demonstrating the effectiveness of this approach. Needless to say, I am extremely pleased with the results of this project.
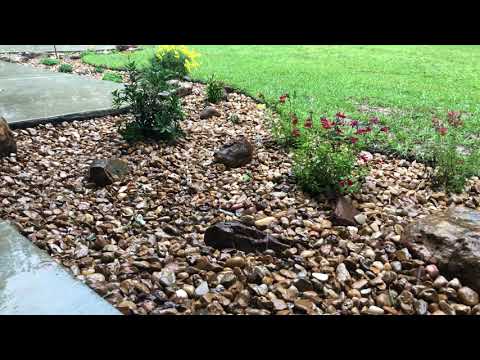
I have the underground drainage system directly under the dripline of the roof. This, along with channels that I dug throughout the bed, ensure that water is consistently moved away from the flower bed.
Ready to see how it’s done? Let’s get started!
Identify Standing Water Locations In The Flower Bed
The first step in this process is to determine where water is “pooling” in the flower bed. Since we didn’t have our flowerbed established, I looked at where the most likely locations would be. For me, the water would settle right along the dripline of the roof.
If your flower bed is already established, identify the low areas where water settles. Drenching the bed with water using a water hose or waiting for a good rain will provide all the clarity you need.
Mark each of these locations where water is pooling in the flower bed. Just sit something on them so that you remember where each spot is.
Determine Where The Water Needs To Go
Once you have identified low areas, you will want to determine where you can route this water to. You are looking for the lowest point outside of the flower bed, ideally away from the house.
I have a low area on the side of my house where water naturally drains so I took advantage of that. Some people choose to route the water completely out of their yard to a street or adjoining field. My only caution is this: the further away you choose to route the water, the larger the difference in elevation will need to be. As long as you aren’t creating another issue, just focus on getting the water away from the bed.
If routing water from your flower bed causes standing water in your yard, read my post on how I added a french drainage system to my yard. You could actually connect the piping from this project to a yard french drainage system for an all-in-one solution!
Check For Underground Cables and Pipes!
You know the importance of checking before you dig. Call 811 or go to their website and have your area checked prior to putting a shovel in the ground.
Digging A Trench For The French Drain
The next step in the process is to roll up your sleeves, grab a shovel, and begin digging a trench. This part isn’t fun but it’s a critical step to the process.
If you don’t want to do the digging yourself, you have options. You can hire someone to do the work for you. Check your local Facebook Marketplace, newspapers, and board postings at local stores for people looking for work. I have hired out work many times through these avenues.
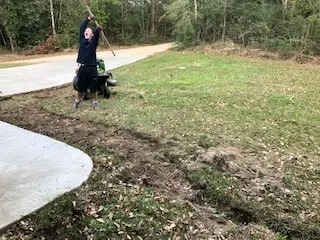
For our project, I chose to take advantage of free labor. My son, Mason, needed the exercise and I was obliged to provide that service. 🙂
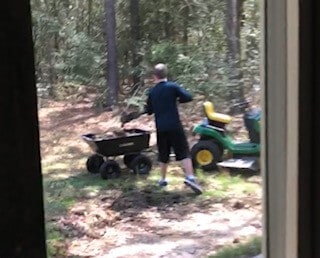
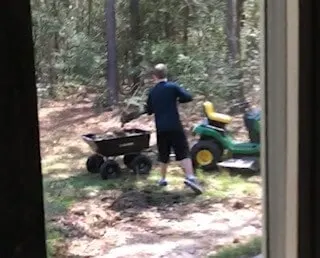
Since the bed itself had to be dug in addition to the trench, there was a lot of work to be done.

Ensure A Proper Grade For Water Drainage From The Flower Bed
You don’t have to be exact with this and you don’t need a huge decline, but it is important that there is at least some difference in where the water usually settles and where it is going. The underground pipe will do an excellent job of carrying the water away from your flower bed as long as it has somewhere to go that is at least a little lower than the bed.
I ran underground pipe along the dripline of the entire front porch. The pipe is shallow at one end and gets steadily deeper toward the other end. This way, water only has one way to go and that is away from the bed and out to the side of the house.

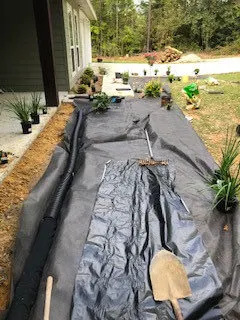
I used corrugated drain pipe for this project.
In this picture, you can see the pipe laying in the trench on top of some weed guard fabric. I have seen people make the mistake of putting the pipe directly into the trench without a fabric. This can result in the small slits along the side of the pipe getting clogged with dirt and reducing its effectiveness. Always use fabric or some type of semi-permeable membrane between the dirt and the pipe.
There are different options depending on your need. Because we were using rock instead of mulch, plain old corrugated pipe was sufficient. If we were using mulch or intended to cover the pipe with sod, I would have used EZ-Drain piping which includes a wrapping of styrofoam pebbles and a sock. You can read about my experience with that in my previous post on my yard drainage project that I mentioned earlier.
This picture shows how the grade of the trench ensured that water was flowing away from the bed toward the low area on the side of my house.


Choose How Water Will Flow Out Of The Pipe
It is usually fine for a small amount of water to remain in the french drain pipe. It will slowly absorb into the ground. The focus is to provide a way for excess water to move quickly away from the flower bed.
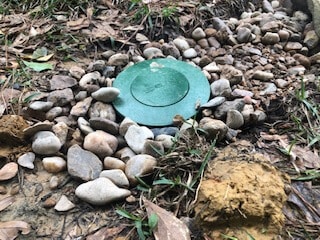
I chose to use a pop-up emitter for the end of my drainage pipe. When the water level rises, the top of this emitter “pops up” allowing excess water to run out. You can put these at ground level in sod and mow right over them. I chose to fill the trench with rock since I had plenty left over but I’ll let the grass gradually grow over the rock since this is outside of the flower bed. WIthin a season or two I probably wont even be able to see the rock.

Adding Channels Within The Flower Bed To Route Water
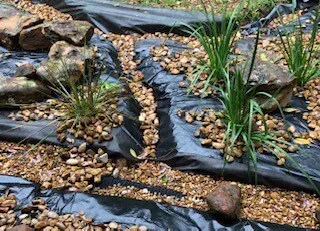
Since all of our standing water issues were not in a straight line, we dug channels in various places around the bed to route water toward the underground drainage pipe. Below you can see the outline of one of these channels. This keeps water from getting trapped in a low area.

Cost Vs. Benefit
For under $100 including the weed guard fabric, this french drain was a no-brainer solution to a potentially huge issue. By eliminating the standing water and the multitude of issues that come with that, I consider this project and worthwhile investment. We could have saved a little by digging the flower bed and letting the water sit but I just couldn’t do that.
Conclusion
I have been extremely pleased with the performance of this drainage system. It effectively drains and prevents standing water in the flower bed. Best of all, because we laid the pipe on top of the weed guard fabric, I’m confident that the drainage system will last. Dirt will not stop up the holes in the pipe and the system will provide effective drainage for many, many years to come.
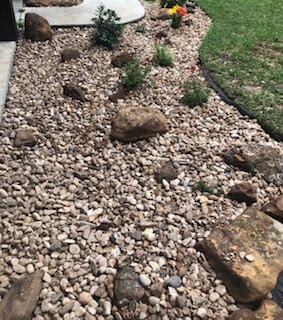

The french drain runs along the front porch on the left side of this picture. As you can see, you can’t even tell that its there. But it is a lifesaver anytime it rains. It keeps the flowers from sitting in standing water and prevents the threat of water flooding onto my front porch. Perfect!
If you are dealing with standing water in your flower bed, I can highly recommend this do-it-yourself solution. Just take the time to plan it out and you will be very pleased with the results. Plus, your plants will love you for it! 🙂
I hope this article has been helpful. Please share it if you found the information useful.
If you are interested in improving the energy efficiency of your home, read how you can conduct your own FREE home energy audit using my guide and downloadable worksheet.
As a homeowner, I am constantly experimenting with making the structure of my house more energy-efficient, eliminating pests, and taking on DIY home improvement projects. Over the past two decades, my family has rehabbed houses and contracted new home builds and I’ve learned a lot along the way. I share my hard-learned lessons so that you can save time and money by not repeating my mistakes.