I receive a lot of questions on air-sealing a home. I’m no expert but I have certainly done my research and invested a lot of sweat equity in rehabbing old houses and building new ones. My insight doesn’t come from a degree in engineering. It comes from countless hours of research and hands-on experience.
I’ve compiled a list of the most common questions below.
Is air sealing important?
This is probably one of the most common questions that I receive. Many people believe that insulation is all you need to ensure an energy efficient home. The problem is, traditional rolled or blown-in insulation is not designed to stop air from leaking through cracks and crevices. It’s important, but it’s not enough.
Is air sealing important? Air sealing is one of the single biggest improvements that you can make to the energy efficiency of your home. Imagine removing the rubber seal from around your freezer door and the cold air that would be lost. That’s the equivalent of not having a properly air sealed structure.
The reason many people shy away from air sealing their home is that they expect the cost to be very high and they don’t really know how to go about it. Let’s talk about that first one…
How much does it cost to air seal your home?
The cost to air seal depends to a great deal on the extent of air sealing that you choose to do and whether or not you hire someone to perform the labor.
Generally, air sealing a home costs between $50 and $300 and will improve the energy efficiency of the structure. Air infiltration can increase a home’s heating and cooling costs by up to 40%. Reducing that infiltration will result in lower costs and more comfortable living space.
This estimated cost of air infiltration is not arbitrary. It is the finding of the Department of Energy and Environmental Protection Agency’s latest supported studies for Energy Star (source).
I was able to save a significant amount on labor when building my latest home by doing the air sealing myself. A lot of this was done in the attic where I could see opportunities for air infiltration. I sealed these with Great Stuff expanding foam.
When your attic is already insulated, this approach can be difficult. A simpler but effective solution is to focus on air leaks from inside the home.
How to air seal a house from the inside?
There are many opportunities within your home to increase the energy efficiency with air-sealing. Windows, doors, vents, outlets, and light fixtures are just a handful of the potential breaks in the thermal envelope of your home.
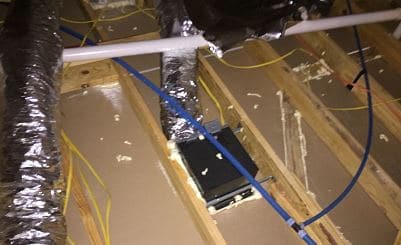
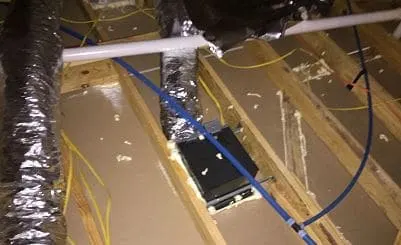
For an extreme example, take a look at this “professionally installed” clothes dryer vent. The hole was improperly sized for the vent pipe resulting in a large air infiltration issue.
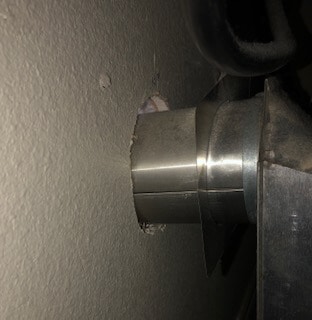
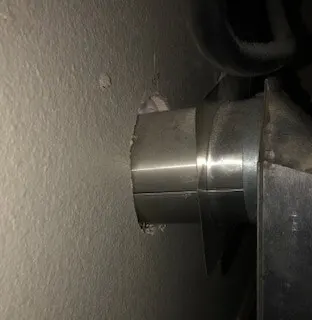
To really understand the significance of this air leak, here’s a picture of it in the dark.
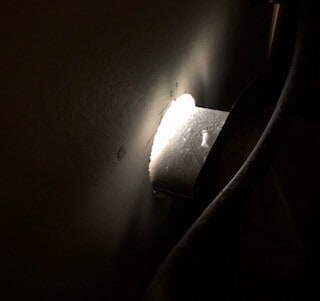
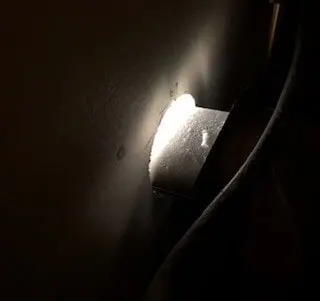
The amount of light coming demonstrates just how poorly this was installed. And in case you are wondering, this was not an old, inexpensive home. This was a custom built house, less than two years old.
The problem is that people don’t look behind their dryer so these type of issues are often missed. I can’t image how much energy was lost from this one air leak.
There are likely spots like this all around your home. Inspect all exterior walls as well as the ceilings and garage. Identify any areas where conditioned air could be leaking out and put a stop to it to save on energy costs!
How do you find air leaks in your house?
I have written an entire guide on conducting a DIY home energy audit that goes step by step through the process of identifying air leaks. It also includes a free downloadable home energy worksheet. I would recommend reviewing that information but below are the nuts and bolts of this process.
It’s handy to use a smoke pencil to visually find air leaks throughout your home. These can be very beneficial as they will detect air movement that you may not see and may be too mild to feel.
If you want to hunt down air leaks manually, here are a few tips.
Exterior Doors
Probably the biggest source of energy loss in most homes is exterior doors. They are frequently opened and closed and as a result, the weatherstripping often deteriorates and compresses.
Visually inspect the weatherstripping to ensure that it is in good condition. Pay particular attention to the corners where the edges of weatherstripping meet. Inspect from the outside and inside to ensure that there are no visible issues.
Next, run your hand slowly along the edges of the door and feel for a difference in temperature. Do this from outside and in the house. If you notice warm or cool air suddenly, you have an air leak issue.
Windows
Windows can be a source of significant energy loss, especially if the windows are single paned or have old framing. I’ve previously written a detailed article on air-sealing drafty apartment windows while I was working on my daughter’s apartment. The principles are the same whether you live in a house or apartment. Click here to read those instructions.
The trick with windows is to ensure that you have an adequate air seal both inside and out. Read the article to get a really good handle on how to do this.
Outlets
These are overlooked so often yet I’ve found that time and again, electrical outlets on exterior walls allow for a surprising amount of air infiltration. See tip #14 from this article to learn the simple and effective way that I dealt with this in my home.
Light Fixtures and Vents
Every light fixture and vent in your ceiling is an opportunity for air infiltration. Think about it for a moment. It is literally a hole in your ceiling! The ideal way to seal these is from the attic but we can still make a positive impact on them from inside.
When working around electricity, always be mindful not to create a fire hazard with your home efficiency efforts. If in doubt, consult a professional!
Latex caulk works great to seal around the inside of recessed lights, especially the newer LED versions that often come as an all-in-one solution. You may not be able to completely air seal your lights from the inside but that doesn’t mean you shouldn’t do what you can. Just be sure not to create fire hazards.
Here’s an example from my own home. I used LED recessed lights throughout so the light and the trim is a solid piece (not air leaks!). However, this light was not fitting tightly against the ceiling, resulting in an opportunity for air infiltration.
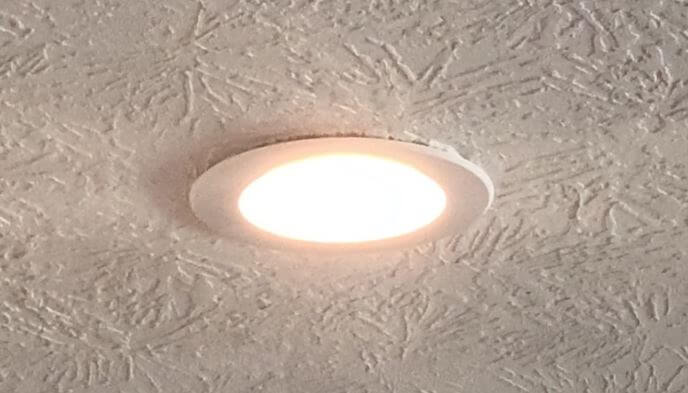
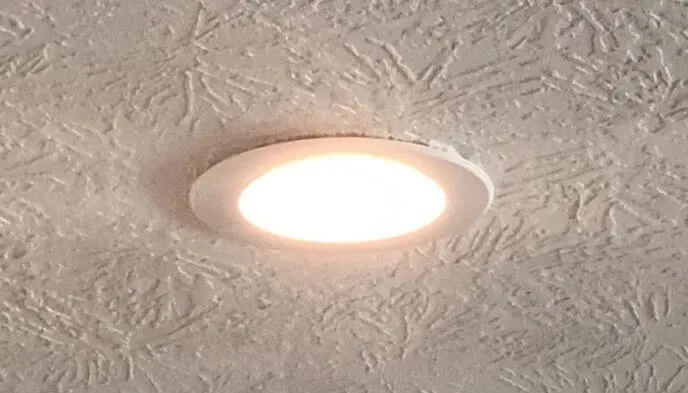
Although I had air sealed these pretty well in the attic before the insulation was blown in, my OCD required that I address it from the inside as well. I ran a bead of caulk on the underside of the recessed lip and pressed it against the ceiling for about two minutes.
Problem solved! It looks better and I sleep better knowing that particular air infiltration opportunity is dealt with.
Note: If you have any doubt or concern that caulking/air-sealing an area could result in a fire hazard, get in touch with a professional and have them look at what you are wanting to do first.
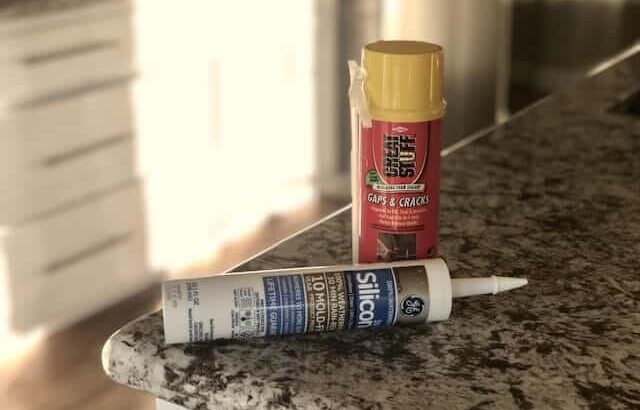
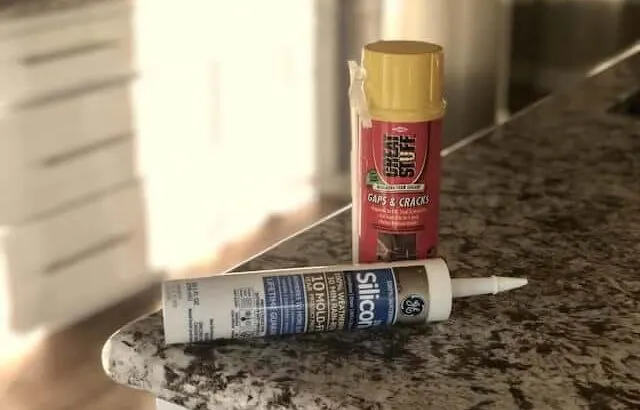
What is the best caulk for air sealing?
Choosing the right air sealing product is important. I learned the hard way that going cheap just results in having to do the work twice.
How to check for air leaks around windows. Visually inspect for evidence of light coming in. Feel around the edges for hot or cold air depending on the temperature outside. To really evaluate air leaks around windows, invest in an inexpensive smoke pencil.
I used a cheap caulk to seal around the exterior of some windows on my home. It wasn’t long before the caulk began to mildew and it looked disgusting.
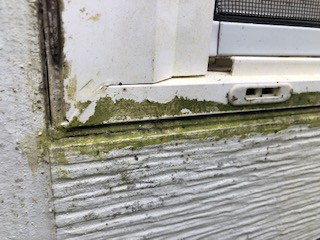
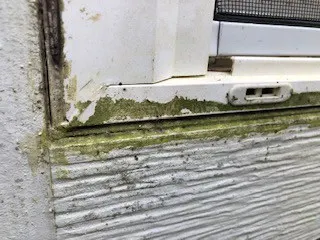
You can even see everywhere that the caulk smeared. It didn’t show up when I applied it because everything was white but, with time, well…
Trust me on this one. To air seal around the exterior frame of your windows, go with a MOLD-FREE Silicone caulk. It’s available in white to blend with matching window frame colors or you can just use clear silicone. Going cheap on this one will just leave you frustrated, cleaning up your mess, and doing the job all over again.
On the inside of your home, however, you do have choices. Stick with a paintable silicone or just use white if that will not contrast with your decor. You want to ensure a constant seam of caulk is present all the way around your window where the window frame meets the wood or sheetrock.
The same holds true for air vents and light fixtures. Seal joints and cracks where two different materials meet. Every sealed joint brings your home a little closer to energy-efficient bliss. See How To Seal Air Vents Correctly: 2 Steps To Energy Savings.
Remember, anywhere two materials meet on a ceiling or exterior wall is an opportunity for air infiltration.
Conclusion
The more you understand about air infiltration and its impact on your energy bills, you more you can do to reduce that waste. Consider investing some time in conducting your own home energy audit and use my free guide and downloadable worksheet. You will gain more knowledge about your home’s energy efficiency than you might suspect.
Related Question
Is foam insulation a good investment? Click here to read Foam Insulation: Pros, Cons, And Is It Worth It For You?
As a homeowner, I am constantly experimenting with making the structure of my house more energy-efficient, eliminating pests, and taking on DIY home improvement projects. Over the past two decades, my family has rehabbed houses and contracted new home builds and I’ve learned a lot along the way. I share my hard-learned lessons so that you can save time and money by not repeating my mistakes.