
Framing a window for a remodel or during new construction requires basic tools and a fair amount of patience. It’s super-simple for a pro but can be done by a DIY enthusiast with the proper tools.
Framing for a new window can be accomplished through the steps outlined in this article.
I will also walk you through the energy-efficiency ratings of new windows so you can make the most informed choice.
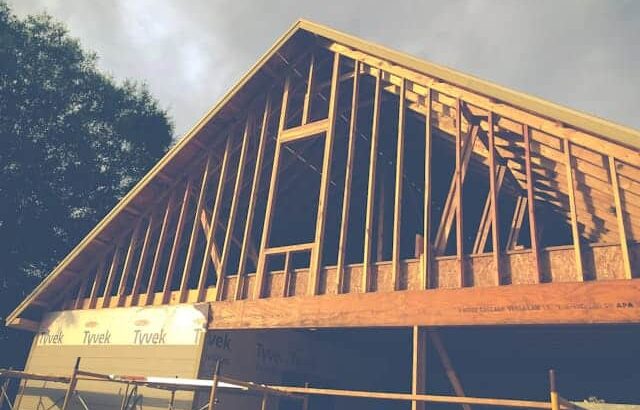
Note: I’m going to include steps for creating a new window frame in an existing wall but I’ll show examples from a recent new construction so that you can see the “bones” of the framing and what’s actually going on.
How to Frame a Window Step by Step


Now that you have chosen the best energy efficient window for your application, let’s go through the steps necessary to install a new window frame in your home.
Note: Before proceeding, check with your local building codes for permitting necessary to install frames and new windows. Also, homes built before 1978 may include lead paint.
Tools and Materials List:
- Measuring tape
- Marker
- Circular saw
- Pry bar (may be necessary to remove siding or drywall)
- 2×6 lumber for window framing, to measurements
- Fasteners for framing and window install
- Hammer/drill
- Window
- Window Caulking
- Flashing
- Weather-resistant barrier
- Insulation and maybe expanding foam
- Drywall and supplies for repair work, to measurements
- Exterior window trim, to measurements
- Interior window trim, to measurements
- Paint
Let’s go through the process:

Plan the location
Several considerations must be taken into account, including interior decorating plans, aligning with existing windows, or working around plumbing and electrical lines—you may need to move them.
Determine if the exterior wall is load-bearing or not.
Load-bearing walls run perpendicular to floor joists and roof rafters. They require more extensive headers and possibly extra support to safely make a new opening. It is best to consult a professional if cutting a new opening for a window in a load-bearing wall.
Non-load-bearing walls, however, can generally have any size opening without compromising the integrity of the building. Headers are usually 2×6 for up to 4-foot openings, and increase in size from there, but check with your local building codes for guidance.
Align the interior and exterior locations: Measure an equal distance, inside and outside, using an existing window or door as a reference point.
Prepare the interior: Remove trim and moldings from the working area. Cover furniture and flooring in the area.
Locate the studs: Using a stud finder or other manual method, locate the nearest studs within and around the desired opening.
Cutaway the drywall: Using a circular saw, carefully cut away the drywall floor to ceiling inside the studs and gently pry it off the wall.
Remove the insulation from the cavity.
Outside, measure the height and width of the desired cavity for the window, allowing for 1/4 inch extra space. Mark it on the wall.
Cut the exterior siding: Using a circular saw, cut away the exterior siding within the marked perimeter.
Cut the sheathing: Measure the window inset and cut a hole through the sheathing that much smaller than the exterior hole. This will leave an opening just big enough for the window.
Back inside, saw through any studs that cross the window opening and remove. Be mindful of electrical wiring in in-wall plumbing.
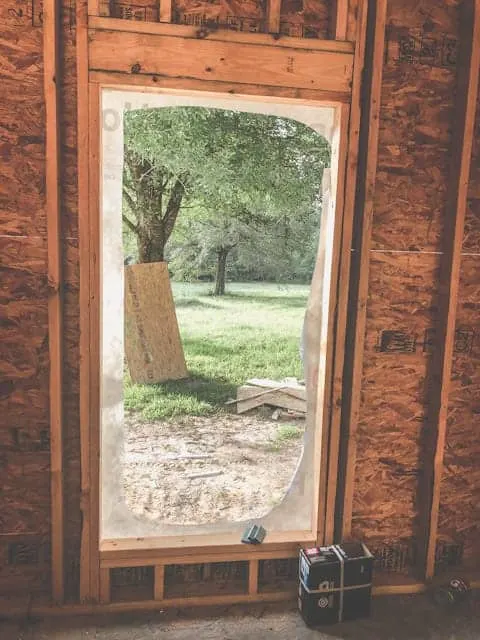
Using advanced framing techniques, install the window framing (source).
- Install king studs or vertical studs that run directly next to the window opening, from the bottom plate to ceiling.
- Install jack studs or studs that run from floor to top of sheathing opening, inside the king studs, as needed for structural support.
- Install the header, which attaches to the king studs on either end and rests on top of the jack studs. The width of the header is determined by the width of the window opening. Check with building codes in your area.
- Install the sill or horizontal piece that attaches to the jack stud along the bottom edge of the window opening.
- Install cripple studs or studs that run from the bottom plate to under the window sill, as needed to maintain on-center spacing for wall studs.
Install flashing and weather-resistant barriers as per manufacturer’s instructions. These will protect building materials from exterior water penetration, which will reduce the risk of rot, mold, mildew, and bug damage. They also can reduce air leakage (source).
Install the window from the exterior. Multiple people are needed to safely perform this step. Nail the flange to the frame only at the corners for now (source).
Measure window for plumb, level, and square. Shim as necessary to correct for any measurements more than 1/8 inch off.
Nail flange securely around the frame.
Seal with caulking, both interior and exterior gaps.
Cut and attach exterior trim. Trim should fully cover any gaps.
Inside, reinsulate the cavities exposed around the window. Fill any possible air leaks with caulking or expanding foam.
Cut and install new drywall around the window opening, completing the proper steps for taping, mudding, and finishing.
Install interior window trim, and reinstall the floor trim and any other molding that was removed for the install.
Paint trim and walls.

Energy Efficiency Ratings for New Windows
Before discussing the styles of windows or how to install them, it is important to understand how they are rated. Most windows today are rated by Energy Star for solar heat gain and U-factor.
Windows are less efficient than solid walls, and can lose or gain heat by conduction through the glass, radiation from the sun or interior space, and air leakage through and around the window frame.
U-factor measures the amount of non-solar heat flow, either through the glass itself or through the whole window unit, depending on the rating system. Low U-factor measurements mean better energy efficiency.
The Solar Heat Gain Coefficient (SHGC) measures the amount of direct solar radiation a window unit allows to penetrate through the glass. A lower measurement is good for transmitting passive solar for colder climates, whereas a higher measurement is good for blocking passive solar heat for warmer climates or situations.
Air leakage is also measured in a window’s energy efficiency. Assuming the window is installed properly, a lower air leakage measurement indicates a tighter window frame.
There are also measurements for visible light transmittance, to reduce glare. All of these measurements are available on a label on new windows.
Determining the best combination of energy efficiency ratings for your particular situation can save you money by reducing your heating/cooling expenses (source).
Window Types
Today, there are a myriad of choices for new windows. Technology has made them better insulated, as well as increased the number of coatings and styles available. Let’s look at some of the decisions to make when choosing new windows for your home.
Frame Choices
Window frames refer to the part that surrounds the glass. Many choices of material are available, with different characteristics that change the energy efficiency, or U-factor.
| Frame Material | Maintenance | Pros | Energy Efficiency |
| Aluminum/Metal | Low | Strong and light | Very low |
| Composite | Low | moisture/decay resistant | Medium-High |
| Fiberglass | Low | Stable and strong | High |
| Vinyl | Low | UV protected, moisture resistance | High |
| Wood | High | Attractive/paintable | Medium |
Glazing and Insulation Choices
Besides frames, several choices of glass coating are available that contribute to the U-factor ratings. All of these coatings are particularly useful in hot climates to reduce solar heat transfer.
- Insulated windows: Insulated windows have multiple panes of glass with sealed air gaps in between that help raise the energy efficiency rating. Most windows today are “double” or “triple” paned, meaning they are insulated in this fashion.
- Low-Emissivity Coating: This coating is a very thin metallic oxide layer that is coated on the panes of glass. They can reduce energy loss by as much as 30-50%. Several levels of protection are available.
- Spectrally Selective Coatings: These block UV light, while allowing the full spectrum of visible light. These filter out 40-70% of the heat transmission.
Operating Styles
Finally, windows come a a variety of operating styles that determine how they open. These can affect the air leakage ratings of windows.
| Operating Style | How they open | Air Leakage |
| Awning | Hinged at top, open outward | Low- presses into frame |
| Hopper | hinged at bottom, open inward | Low- presses into frame |
| Sliding | Sash slides horizontally | High-can leave gaps |
| Fixed | Don’t open | Very Low- no gaps |
| Double Hung | Sash opens vertically | High-can leave gaps |
| Casement | Hinged at side, opens in or out | Low- presses into frame |
Conclusion
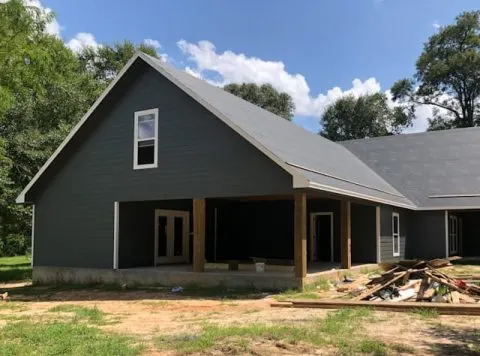
Adding a new window to a remodel or while framing a new home can be accomplished with some careful steps. Although not necessarily a quick job, it can add light and function to an otherwise dark room.
Remember that it is important to choose the best energy-efficient window for your needs. By assessing your space, sun exposure, and desire for passive solar heating, you can determine which energy rating will best suit the space.
After choosing a window, the process for cutting a cavity through the interior and exterior walls, framing a safe window support, and installing the window can be a do-it-yourself project if you are patient and up to the task.
Unless you must move plumbing or electrical lines, the process involves a few tools and careful measurements.
If you are installing a window in a load-bearing wall, you may want to consult a professional. However, in a non-loading bearing wall, there is little danger of compromising your home’s structural integrity.
Related Reading: How To Attach Bottom Plate To A Concrete Floor
As a homeowner, I am constantly experimenting with making the structure of my house more energy-efficient, eliminating pests, and taking on DIY home improvement projects. Over the past two decades, my family has rehabbed houses and contracted new home builds and I’ve learned a lot along the way. I share my hard-learned lessons so that you can save time and money by not repeating my mistakes.
Leave a comment
You must be logged in to post a comment.