
So, you’ve just gotten done installing your Sheetrock, and then you notice it: the dreaded mud bubbles. How in the world did this happen? You were careful to install the Sheetrock according to the instructions, so what caused the mud bubbles in your Sheetrock?
Sheetrock mud bubbles occur when there are air bubbles under the drywall tape. Air bubbles in your Sheetrock can happen for a few different reasons:
- The compound is too dry.
- You didn’t use enough joint compound.
- You used too much joint compound.
- There wasn’t enough pressure on the Sheetrock.
- The compound was improperly mixed.
- The walls underneath the compound are painted.
I will tell you about how each of these can happen to your Sheetrock and why these common mistakes can cause air bubbles. I will also tell you how to carefully avoid them and give you a few tips for removing the mud bubbles if they have already happened, so be sure to read until the end!
1. The Compound Is Too Dry
When the drywall compound gets too dry, it makes it harder to work with. This harder material can cause air bubbles to form under your tape because the tape won’t properly stick to the drywall.
To avoid your compound drying out, be sure to securely close the container when storing it. You can even cover the mixture with plastic for an extra layer of protection when you aren’t using the compound. If you notice that your compound is too dry when you go to use it, you can try adding a little water to the mix to loosen it up. This will help soften the material and make it easier for you to use.
It would also help if you were careful not to let the compound get too dry while working with it. For example, if you are trying to work on multiple seams in a room at once, the mixture may dry up before finishing all the seams in the room. Try to only compound a few seams at a time to avoid the mixture drying out before you are finished working with it (source).
2. You Didn’t Use Enough Joint Compound
Bubbles can occur under Sheetrock when there isn’t enough compound between the tape and the drywall. The lack of mixture can allow for air to flow in and become trapped between the tape and the drywall. This means the tape cannot properly adhere to the wall, and these uneven pockets can cause the tape to bubble.
To avoid this common mistake, pay attention to how much compound you are using before applying your tape and be careful to not remove too much of the mixture. The amount of compound left on the tape should be even and not too thin (source).
3. You Used Too Much Joint Compound
On the other hand, using too much joint compound can also cause the tape to bubble. Leaving too much compound can cause the tape to adhere to the wall unevenly, which can also cause adverse effects. Instead of air being trapped underneath the tape, the compound itself can be too lumpy which will cause bubbles in your drywall.
While you want to make sure that you don’t scrape away too much from the tape, you also want to make sure that you scrape enough. The amount of compound left on the tape should be evenly distributed and not too thin or thick. Applying the correct amount of compound will ensure that your material doesn’t lump up and will help you avoid mud bubbles (source).
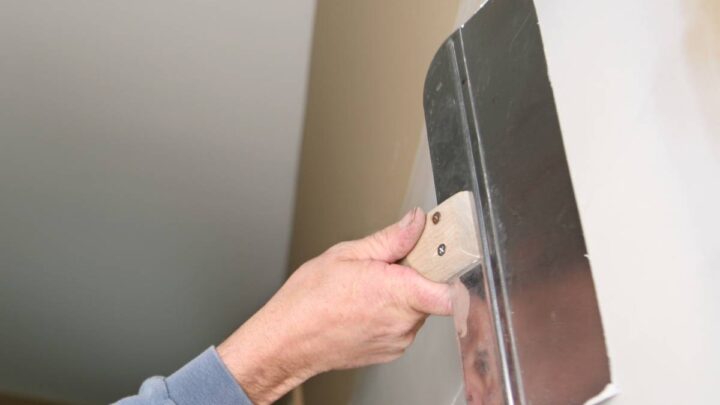
4. There Wasn’t Enough Pressure on the Sheetrock
When installing drywall, you want to make sure you are applying pressure evenly across the drywall tape. Using force when applying the tape allows you to level out the joint compound and push out any excess mud which may cause your tape to be lumpy if left to dry.
It’s also an easy way to remove any extra air pockets under the tape and in the compound mix, which decreases the chance of mud bubbles in your drywall.
Using a wide taping knife will help you better control and evenly distribute the pressure you apply. Though be careful not to apply too much pressure as this may remove too much compound and bring you back to number 2 on this list: not using enough joint compound (source).
5. The Compound Was Improperly Mixed
Another cause of bubbles in your Sheetrock is air pockets in the premixed joint compound.
The joint compound you use should have the same consistency throughout the entire bucket.
An uneven consistency or air bubbles in the mixture can translate to bubbles in your Sheetrock.
The best way to avoid this is to gently mix your compound, even if you buy a premixed solution.
A few quick stirs can save you the headache of having to remove bubbles later.
If necessary, you can also thin out your compound by adding in water. This makes it a little easier to work with and can help loosen up the material (source).
6. The Walls Underneath the Compound Are Painted
Drywall mud doesn’t stick well to all paint types. Paints with a semi-gloss or glossy finish make it harder for the drywall to adhere to the wall. Anytime drywall mud isn’t sticking properly, there is a chance air bubbles can form.
If you are installing drywall over a previously painted wall, be sure to use a primer and remove any excess drywall that has chipped. This will better help the drywall stick to your wall.
Getting Rid of Sheetrock Mud Bubbles
Following the tips above will help you decrease your chances of having mud bubbles in your drywall.
However, if you happen to notice a bubble, here is what you should do:
- Cut out the tape currently covering the air bubbles.
- Apply new joint compound to the area.
- Repeat the tips above to ensure a proper application.
- Allow the area to dry.
If your Sheetrock mud has not yet dried, you may also be able to smooth out any air bubbles between layers without having to cut out the bubble and re-apply the joint compound.
Recommended Reading:
- Should Drywall Be Installed Vertically or Horizontally?
- Should Drywall Touch the Floor? Best Practices Explained
- Nails vs Screws for Drywall: Pros & Cons of Each
As a homeowner, I am constantly experimenting with making the structure of my house more energy-efficient, eliminating pests, and taking on DIY home improvement projects. Over the past two decades, my family has rehabbed houses and contracted new home builds and I’ve learned a lot along the way. I share my hard-learned lessons so that you can save time and money by not repeating my mistakes.