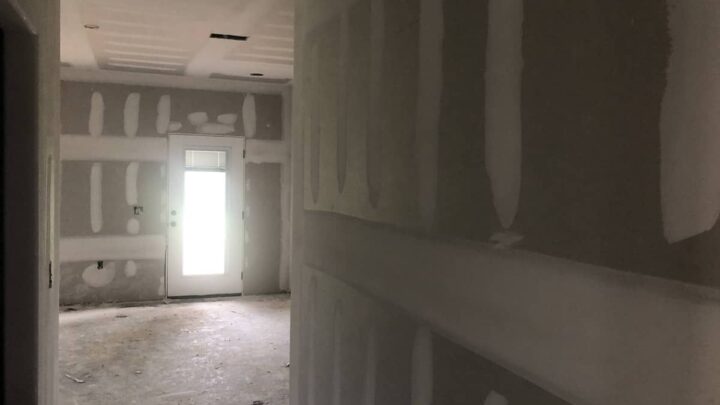
Sometimes rooms have an obstruction or obstacle where the drywall needs to be installed, such as a door frame, window frame, pipes, etc. However, when you’re installing plain old walls with no obstructions, you oftentimes wonder if they should reach all the way down to the floor?
Drywall should NOT touch the floor. Allow for floor and wall expansion without cracking the drywall by keeping a 1/2-inch (1.27-cm) space between them. This space also aids in preventing moisture from seeping if the floor floods.
In this article, we’ll teach you best practices for installing drywall, including how to install it over obstructions and obstacles.
Best Practices To Follow Before Placing Drywall
When installing drywall, use work gloves, safety glasses, and a dust mask to avoid inhaling any particles. There are a few industry standards to follow when installing drywall, including the distance between drywall seams.
The following points will help you understand some essential practices regarding how high should your new walls be if they touch down on top of an existing floor.
1. A Starter Tool Kit for Drywalling
You’ll need some basic tools when hanging or installing drywall, so be sure that your tool kit includes these items before beginning any project:
- T-square
- Utility knife
- Box cutter
- Tape measure
- Drill
- Screwdriver
You’ll also find it easier to wear work gloves, boots, and clothing that won’t get caught in machinery parts easily.
See Nails vs Screws for Drywall: Pros & Cons of Each
2. Work in Pairs When Installing Drywall
When installing drywall, you can do it yourself if you like, but having someone to help out would make the task considerably easier. After tacking up panels, you’ll need to install them. Hanging drywall is a time-consuming job that only half of the work is complete.
The other half of the job involves getting them to meet perfectly on the seams. So having a partner who can install panels while you are busy tacking up others is crucial for an effective drywall installation.
3. Bound Edges Should Pair, and Raw Edges Should Pair
When hanging drywall, the best practice is to have all your bound edges paired and all raw edges paired. You shouldn’t always place the seams of drywall sheets against each other so as not to create an unlevel surface when installed on top of existing walls or floors.
Suppose you hang a sheet that touches down onto an existing floor (such as in new construction). In that case, there must be at least ⅜” (0.95 cm) perimeter clearance between the bottom edge of any horizontal joints and sub-flooring material.
This space provides ventilation space under the finished floor covering materials such as vinyl tiles or wood planks which expands over time due to humidity changes within building air spaces.
4. Use Additional Spacing When Installing Drywall on Top of Concrete
When appropriately installed on wood subfloor material, drywall joints should never touch the ground.
If you install drywall onto the concrete below finished floors (as opposed to hardwood subfloors), then there must be at least ½” (1.27 cm) of space between any horizontal seams and the bottom edge of all vertical lines of joint compound (source).
This will allow air to circulate freely through building walls during high humidity periods, which cause drying shrinkage cracks within dried mud coatings along wall surfaces. In this case, a small gap will minimize future cracking problems arising from continuous expansion/contraction cycles throughout building interior spaces.
5. Less Room Is Required When Installing on Finished Flooring
When installing drywall along walls and ceilings in a finished (i.e., carpeted, paneled, or tiled) room, always allow for at least ¼” (0.63 cm) total expansion space between the bottom of all horizontal seams and any vertical surface upon which they rest; such as:
- Wood sub-flooring
- Tile flooring
- Wall surfaces above chair rails (or other protruding trim)
This will prevent cracking problems caused by contracting/expanding movement within building interior spaces. It’s much better to err on the safe side by allowing slightly more than too little gap space because you’ll minimize future repair hassles after the fact.
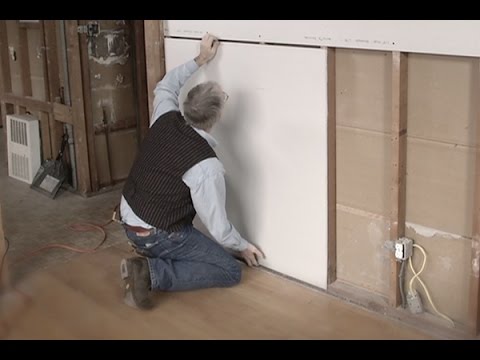
This YouTube video from finehomebuilding demonstrates a simple hack for lifting and holding a sheet of drywall off the floor while securing it to the wall:
6. Always Hang Drywall Ceiling to Floor and Left to Right
Hanging drywall ceiling to floor and left-to-right is the best practice for ensuring that walls, floors, and ceilings all end up with perfectly level surfaces.
The ceiling should always be installed first in areas with a drywall ceiling. The wall sheets at the ceiling angles butt up flush against each other due to this method of hanging them before the walls. This primarily tightens and simplifies the junction points at the tops of ceilings.
Starting from the ceiling down, you can hang the walls after the ceilings (lids) are in place. This helps to keep the ceiling angle tight and makes finishing it much easier.
Typically, walls are hung from left to right or right to left. Because of this, when laying out the layout of each wall, you may inadvertently measure it 1/4 inch (0.63 cm) short.
7. Apply the Finishing Touches
Once the flooring is installed, the walls are drywalled, it is time to apply your final touches! This means taping off any joints or seams with fresh tape before applying a light sanding coating over it. You can also paint or wallpaper at this point as long as you wait 72 hours first for proper curing.
Trim should be one of the final steps of your drywall installation project. The walls must be painted and allowed to cure for a full 72 hours before being trimmed out with crown molding or baseboard.
You may also want to paint the trim first to match exactly how you would like it, but this should not be done until after at least 24 hours of curing time has passed since painting or papering the wall itself.
Conclusion
Drywall should never touch the floor. Allow for a 1/2-inch (1.27 cm) space between your new wall and your old flooring, so there is room for expansion of both materials without cracking the drywall.
This will also prevent any moisture from seeping if the floor floods, which could lead to mold growth on or close to your walls. Follow these simple tips when installing or repairing drywall to ensure that it’ll last as long as possible and never touch the floor, which can lead to cracks in your wall’s surface.
Recommended Reading:
- How Long Does Drywall Last in a House?
- Can You Tile Over Drywall? Is It Safe?
- Should Electrical Boxes be Flush with Drywall?
As a homeowner, I am constantly experimenting with making the structure of my house more energy-efficient, eliminating pests, and taking on DIY home improvement projects. Over the past two decades, my family has rehabbed houses and contracted new home builds and I’ve learned a lot along the way. I share my hard-learned lessons so that you can save time and money by not repeating my mistakes.