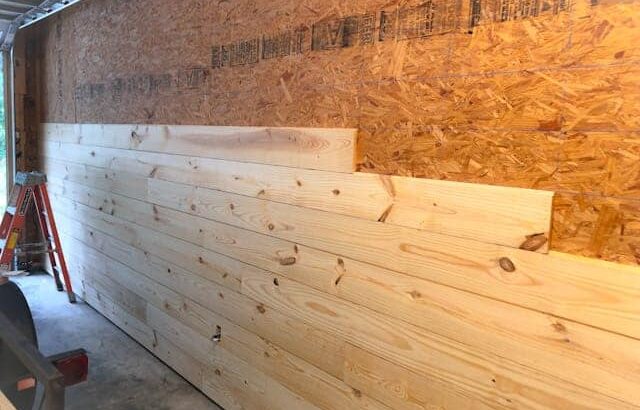
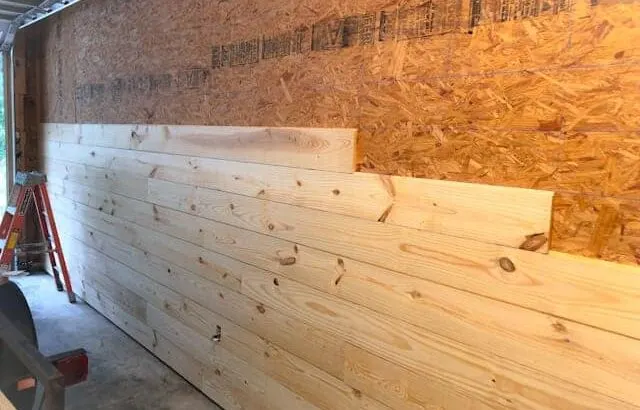
I recently had pine tongue and groove siding (aka shiplap) installed over OSB walls in my garage. There were a few lessons learned in this process but overall it was a fairly simple upgrade. Here are the key points to keep in mind when doing this:
When installing pine tongue and groove over existing OSB covered walls, take the time to mark the location of the framing studs. You want to nail through the OSB into the stud. This will prevent warping or “waves” developing in the siding over time.
Let’s walk through my install and look at some of the specific areas where you can save yourself headaches by doing things right the first time.
Why Can’t You Just Nail The Siding Into The OSB?
Brad nails can pull loose from OSB over time. By taking the time to install to locate and nail through the OSB into the framing stud, you are ensuring a lasting install.
I have seen plenty of installers simply nail shiplap siding to the OSB. It looks great when they leave but as time goes by, the siding can begin to separate from the OSB paneling resulting in a wavey appearance along the wall.
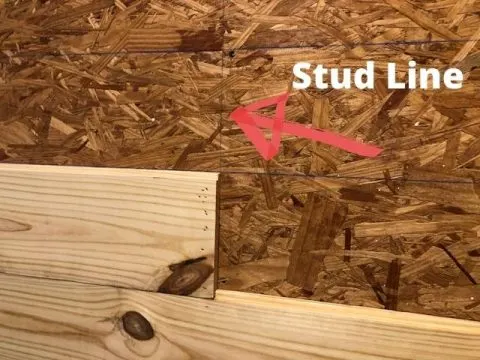
Do yourself a favor and just do this right the first time. It generally a quick and easy process to identify the location of the studs by simply looking for the screws where the OSB is secured to the wall.
Mark the studs with chalk or a marker so that you can be sure to hit them when nailing the siding up.

This little bit of prep work saves tons of time during the actual install and can prevent a world of headaches in the months and years later.
How To Install Tongue And Groove Siding
Installing shiplap is pretty intuitive. In fact, it feels a little like building with Legos. Each piece fits snugly into the other and by and large, it goes smoothly.
There are, however, a couple of things to keep in mind.
Watch this short video from YouTube. Although they are installing over drywall, the process is pretty much the same.
Why Stagger Tongue And Groove Siding
Staggering cuts in siding not only improves the aesthetics of a finished wall, it significantly improves the stability and strength of the wall. Cuts represent weak points and by staggering them you distribute the weaknesses evening across the wall instead of creating a single point of failure.


Think about the exterior of a brick house and how the brick rows are staggered. This is done for the same reason that you want to stagger the siding. Strength.
It’s a simple process. Just plan ahead with each row as you install the siding and make sure that cuts are not consistently lining up in the same place.
And be sure that those cuts land on a stud so that you can secure it well. This will prevent bowing of the boards over time (another problem with jus nailing into the OSB).
What Nails To Use For Tongue And Groove Siding
A 16 gauge brad nailer with 2-inch nails will ensure a secure hold without creating large surface indentions.
Wood putty can be used to cover nail holes if needed but I have found that when using these brad nails the indention is barely noticeable and not an eyesore.
Again, the key is to make sure that you are securing the shiplap boards to the framing studs underneath the OSB. That is where the long-term stability of your project will come from.
Those 2-inch nails will drive through the OSB into the framing stud.
Make Sure Your First Board Is Level
The key to a successful install with tongue and groove siding is to take your time with the first board and make it as level as possible. If you skimp here, you’ll pay the price throughout the project.
One issue that you can encounter is the ceiling being level but the floor not being. Garages sometimes have tilted floors that are designed to carry water to a drain in the center or back toward the garage doors. In either case, leveling your first board with the floor can result in the project being off-level.
A simple trick to get around this is to measure from the ceiling down. For example, let’s say your garage ceiling is 9 foot (108 inches) high. By measuring down from the ceiling 107.5 inches along several points in the wall we can mark those points and ensure that we start off with that first board level.
Remember that you don’t want to go all the way to the floor with your boards. Plan to begin your first row about 1.5 inches from the floor. This is the same thickness as the treated 2×4 bottom plates that are secured to the concrete. By keeping your first board off the floor you will prevent the potential for water damage to the wood.
Conclusion
Installing tongue and groove siding over OSB is absolutely doable and can greatly enhance the aesthetics of a wall. Remember to mark your studs ahead of time and to make sure that you are nailing into them, not just the OSB. Take your time getting that first board along the bottom level and it will save you tons of headache.
Related Reading:
- Can OSB Be Used for Interior Walls? Here Are The Facts
- Make A Garage Energy Efficient: Improve Comfort, Pest Control
- OSB Versus Sheetrock In A Garage: Pro, Cons, And Fire Code
As a homeowner, I am constantly experimenting with making the structure of my house more energy-efficient, eliminating pests, and taking on DIY home improvement projects. Over the past two decades, my family has rehabbed houses and contracted new home builds and I’ve learned a lot along the way. I share my hard-learned lessons so that you can save time and money by not repeating my mistakes.
Leave a comment
You must be logged in to post a comment.