
I had a horrible issue with the upstairs floor squeaking under the carpet when walked on a few years ago. Floor squeaks occur when the subfloor separates from the floor frame.
Here are 7 steps on how you can fix a squeaky subfloor under the carpet.
- Identify exactly where the subfloor is squeaking.
- Find out if there are any pipes beneath the subfloor.
- Find the joist.
- Use a drill to confirm the distance between the joists.
- Use a string to mark joists over a large area.
- Use the squeaky floor repair kit to fix the subfloor.
Read on as I will delve into this step-by-step guide on how you can fix your squeaky subfloor.
1. Identify the Squeaky Subfloor
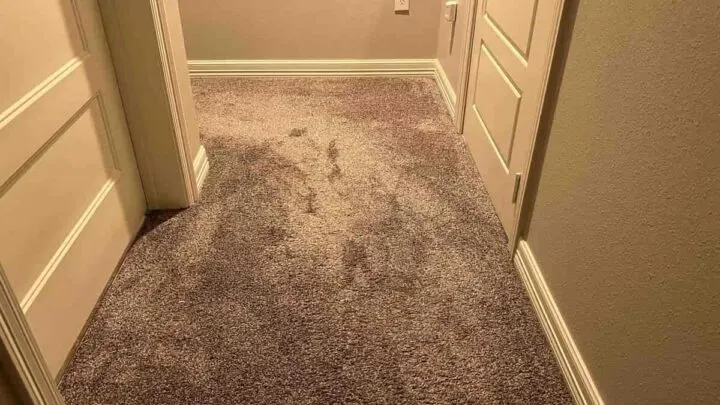
The first step to solving the problem of your squeaky subfloor is to identify the affected area. Unfortunately, this sometimes seems like the easiest step to fix the squeaky floor, but locating the exact spot can be difficult. If you get the spot wrong, you will still hear the squeak even after believing that you have solved the problem.
Walk over the squeaky area and mark the spots where the sounds appear to be loudest. You can mark the problem areas with chalk, a string, or any other item within easy reach.
If you are struggling to identify the source of the squeak, have someone lie on the floor and look out for the squeaks as you walk.
In some cases, you will feel the subfloor dip whenever you walk above it. When this happens, the squeak covers a large area. You need to find the affected floor joists. In my father’s house, we actually found that the floor joists were rotted which turned into a much larger project!
2. Find Out if There Are Any Pipes Beneath the Subfloor
Before you start drilling screws to fix the subfloor, you need to ensure there are no pipes in the squeaky areas. Otherwise, you may solve one problem, only to create another.
You can do this by pulling out one of the floorboards, preferably the one closest to the wall. Alternatively, you can ask your electrician and plumber to confirm the presence or absence of power and water lines underneath the area you intend to work.
This video is a guide on how to find pipes under the floorboard. You will also learn how to avoid them when drilling the screws.
3. Find the Joist
The squeaky sound you hear is usually a result of the subfloor separating from the joist. The joist is the structure that supports your house. Sometimes, the nail that is supposed to keep the subfloor connected to the joist comes loose or misses its target. So the subfloor remains suspended above the joist.
Every time you walk on the affected area, the subfloor rubs against the nail, resulting in squeaky sounds. Unfortunately, this sound will continue to be a problem until you screw the subfloor onto the joist.
You can find the joist in several ways.
Use Joist Finders
You can find joist finders in most floor repair kits. The joist finder is a unique screw that you attach to your drill then you can follow these steps:
- Use a hammer to find out if the sound is hollow or solid. A solid sound shows you have found the joist. A hollow sound signifies the space between the joists.
- Drill in the solid area. If the screw gets attached to a hard surface, you have found the joist. You can also tell if you missed the joist if the drill keeps spinning after it has gone through the subfloor. This means it is drilling in the gap between the joists.
- If you have found the joist, measure 16 inches (40.64 centimeters) to find the next joist. Drill the next spot to confirm you are following the right path. If the screw shows it has attached to a solid surface, then it means the joists are 16 inches (40.64 centimeters) apart. You can follow this path to drill all the screws.
Use a Hammer
The good old hammer can also do the trick in finding the location of the joist.
Listen keenly to the sounds every time you tap the floor with the hammer. The area without joists will have a hollow sound, while the space above the joist will be solid.
This video shows how you can use a hammer to find the joists:
If you have used the joist finder but are still struggling to drill the subfloor in place, you can use the hammer to confirm if you are working on the right area.
4. Use a Drill To Confirm the Distance Between the Joists
Although most modern homes have a 16-inch space between the joists, you still need to verify this before drilling the screws. Drill a screw into the joist and then measure 16 inches. Hit this area with a hammer to check for signs of a solid or a hollow sound.
If you hear a solid sound, drill the area to see if the screw will face resistance. If it does, you are now sure that the joists are 16 inches apart (40.64 centimeters). Mark the joists. Now you are ready to drill the screws without worrying about missing the joists, as this will result in future floor squeaks.
Also, when fixing the screws through the subfloor, you want to fix both sides of the floorboard. Now that you have identified the joists on one side, you should do the same on the opposite side.
5. Use a String To Mark Joists Over a Large Area
You can use a string to confirm that you are following the right joist. This step is especially important if the squeaky area is wide. You may need to screw various parts of the joist. The string will save you time since you won’t measure the distance between joists or use markers.
6. Use the Squeaky Floor Repair Kit To Fix Subfloors
If you are using the squeaky floor repair kit;
- Place the tripod on the carpet over the string. The squeaky floor repair kit (link to Amazon) comes with a special driver bed that stops the screw when it reaches the ideal depth.
- Use your body weight to push the subfloor to the joist. Do this by standing as close as possible to the tripod.
- Put the screw in the tripod. The center of the tripod has been sufficient for the screw and drill. Put the screw in the designated area and drill the screw into the floor. When it gets to the right depth, the screw will not move deeper.
- Break the screw head. The tripod has a special slot that helps break the head of the screw. Fit the screw into this spot and move the tripod back and forth until the screw breaks. The area that breaks is just above the surface of the subfloor.
- Repeat the same procedure along the affected joist. If the squeak covers a large area, you may need to follow the same procedure in the subsequent joists until the subfloor is tightly fitted onto the joists.
As you walk, keep listening to the squeaks to see if the concentration area is becoming smaller. If the sounds are reducing as you screw the subfloor back in place, you have got it right.
Use a Hammer and Screws
If you don’t have a kit, you can still fix the squeak by hitting a hammer through the carpet into the subfloor. The screw should be at least 3 inches (7.62 centimeters) long. The best screws are those that are not threaded at the top.
The unthreaded part of the nail will break easily compared to the fully threaded nail.
Place the screw in the marked spot and drive it into the joist. Screw it down until part of the head remains in the carpet. Step on this area to confirm if the squeak is still a problem. If not, move to the rest of the joists and repeat the same process.
Use a pair of pliers to grip and break the screw. Ensure the pair of pliers is close to the subfloor when trying to break off the head of the screws. The back and forth movement will break the screw head. Do the same for all the other screws.
These Klein Tools angular pliers (link to Amazon) are great for handling subfloor screws because it is heavy duty, it has short jaws,and the angular head allows it to work in confined spaces.
You can also use a drill in place of the hammer.
If you find it difficult to stay in line, tie a string on the screw on one end and connect it to the other on the opposite side. Now you can drill or use a hammer to fix screws along the joist.
Tips on How To Keep Your Floors From Squeaking
Floors will inevitably start squeaking, especially if your home is in an area that experiences extreme temperature changes. Wood expands and contracts when it is hot and cold, respectively. However, you can still take steps to reduce the annoying sounds that make you tiptoe when moving around your home.
- Avoid having extreme temperatures in your house. Although the outside environment can be a problem, the environment in your home can be the cause of the squeaky subfloor. Try to maintain the same temperature in your house, or let it be within reasonable margins.
- Use a humidity meter. Keep track of your home’s humidity. Use a humidifier to control the heat during winter, especially if you use a furnace to keep your home warm.
- Control water damage. Water damage sometimes comes from some of the most unlikely places. It could be your wet boots or wet mops. However, most of the damage comes from a leaking plumbing system. Avoid using a wet mop on your floors. You also need to look out for leaking pipes.
- Keep vibrating appliances away from wooden floors. Washers and dryers are notorious for damaging wooden floors. Their weight and constant vibration cause the screws holding the subfloor to the joists to come loose. You can avoid this problem by placing them on concrete slabs.
- Use carpets in high traffic areas. Over time, high-traffic areas suffer from greater wear. Carpets will control the pressure on the floor and keep your floors in excellent condition for longer.
Key Takeaway
Fixing a squeaky subfloor may seem complicated. However, you could save money by doing it on your own. These steps will help you fix the subfloors as soon as you start noticing squeaks. Waiting too long means the squeaks will be louder, and the damage will expand to a larger area, costing you more time.
Recommended Reading:
- Will Cupped Hardwood Floors Flatten Out Over Time?
- How To Level a Wood Subfloor Without Leveling Compound
- Do You Install Baseboards Before or After Flooring?
As a homeowner, I am constantly experimenting with making the structure of my house more energy-efficient, eliminating pests, and taking on DIY home improvement projects. Over the past two decades, my family has rehabbed houses and contracted new home builds and I’ve learned a lot along the way. I share my hard-learned lessons so that you can save time and money by not repeating my mistakes.