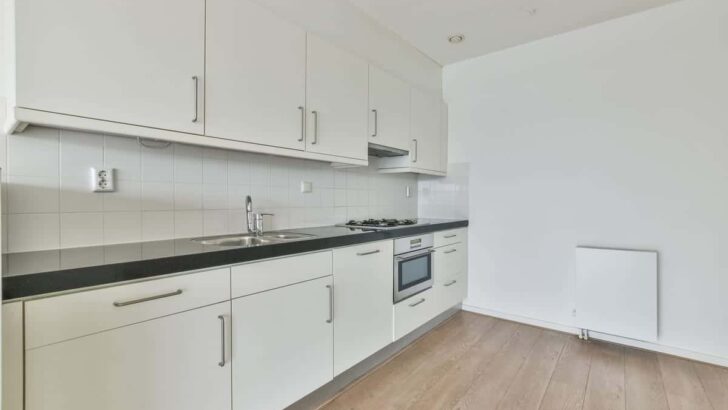
A kitchen island is a beautiful addition, providing extra storage, cabinet space, and even an additional dining area. However, if you are planning to install an island over laminate flooring, there will be complications. Make special considerations to prevent your laminate floor from buckling under pressure.
You should not install a kitchen cabinet directly over laminate flooring. Laminate is a floating floor and will damage if a kitchen island is directly on top of it. If you have to install the island after the flooring is in place, flooring blocks, filler pieces, and toe-kicks will be needed to create expansion space for the floor to expand.
Let’s walk through this process. I recommend consulting a professional if you are not familiar with this process.
What Is a Floating Floor?
The term ‘floating floor’ refers to the floor’s installation. Unlike other methods, floating floors are not attached or adhered to the subfloor. Some common materials include hardwood, cork, some tile systems, vinyl, and laminate.
Here are some specific requirements for this type of flooring:
Expansion Zone
Floating floors change shape throughout the year. Environmental conditions, such as temperature and moisture, cause the changes. For this reason, leave space between the floor, outer walls, and verticle fixtures like a kitchen island. When packed too tight, a floating floor will buckle and pinch. Trims, such as cove base and quarter rounds, can hide the expansion gaps.
Floor Prep
Prepping the subfloor is essential for installing a floating floor. Floating floors cannot hide an uneven subfloor. Even worse, an uneven subfloor will damage the flooring and undo the locking system. The industry standard for subfloor flatness is a ¼ inch (.6 cm) in 10 ft (3 m) or ⅛ inch (.3 cm) in 6 ft (1.8 m). Smooth out the subfloor before installing the floor covering.
Transitions and Moldings
You can install transitions and moldings with a floating floor. However, you cannot nail these pieces on the floor. The required method is to nail these pieces into the wall or substrate instead. Similar to a tightly packed floor, putting nails in the floor will pinch points and buckle the floor.
Cabinets and Kitchen Islands
This is hugely relevant to our conversation. You cannot install a cabinet or island on top of a floating floor. The weight will create a pinching point and will buckle the floor.
As you install your kitchen island, your biggest concern is preventing the laminate floor from buckling. Since you cannot install the island directly onto the floor, install the floor and the island around each other. You can cover the gaps between them later with trim.
Installing the Kitchen Island First
If you decide to install the kitchen island first, use flooring blocks to elevate the island above the subfloor. The elevation will provide space, so your cabinet will sit at the same level as the laminate floor after installation. I will go into more detail below:
Position the Island
Positioning a kitchen island requires a vision for the island’s use and what foot traffic will be around it. Your goal is to choose as accessible of a place as possible. Here are some specs to follow from Laurysen Kitchens:
- Leave a minimum of 42 in (106.7 cm) of space between cabinets and the kitchen island.
- If you are planning to accommodate multiple people at a time or people with disabilities, extend that space to 48 in (121.9 cm).
- You will need chair space if you plan to include a dining counter on your kitchen island. Provide at least 60 in (152.4 cm).
- Once you decide the island’s location, mark it with a washable marker or painter’s tape.
Measurements for the Wood Cleats
Once you plan the island’s position, measure the cabinet wall width. The cleats support the island from the inside, so it’s essential to know how far from the edge of the cabinet they will be. For example, if the walls are half an inch (1.3 cm) thick, mark the cleats half an inch (1.3 cm) in from your initial marks. Make extra considerations for extended islands.
Wood Cleat Installation
First, drill pilot holes into the cleats. Then, use those pilot holes as a guide to drill pilot holes into the floor. After that, screw the cleats through the pilot holes into the floor’s surface.
Elevate the Cabinet
This element is vital for installing a kitchen island with a laminate floor. Since you are planning to install the floor last, you need to install flooring blocks below the cleats to make room for the flooring to fit between the cabinet and the subfloor.
Cabinet Attachment
Once you install the wood cleats, you can remove any measurement markings from the surface. Then, place the base of the island over the cleats. If measured correctly, the island will fit snugly around the cleats. The weight of the island and the security of the cleats should keep everything in place. However, you can screw the base into the cleats for a more solid anchor.
In this scenario, you build the floating floor around the cabinet. However, in my next how-to, I will tell you how to install the flooring first and build the cabinet inside it.
Installing the Floor First
This installation works like the first. You are just reversing the process. When you install the floating floor first, use plywood to mark the space you will need in the subfloor to accommodate the island. After that, configure the cabinet on top of the plywood strips, and hide the expansion gaps with toe-kicks. Here are the step-by-step instructions:
- Place the base cabinets: Mark the subfloor with a line representing the toe-kicks front edge.
- Install filler pieces: Grab a filler piece of plywood that is at least 2 in (5.1 cm) wide and near ⅛ inch (.3 cm) thicker than the flooring, including any cushion or vapor barrier. First, remove the cabinets. Screw the plywood into the subfloor about a ½ in (1.3 cm) inside the marking under the cabinet. Continue the process for each side of the island. Think of it as installing flooring blocks.
- Apply the new flooring: Make sure it is a ¼ in (.6 cm) from the first filler piece. You are installing the flooring around the filler pieces.
- Cabinet installation: Lastly, configure the cabinet on top of the filler pieces and apply the toe-kicks. Space will allow the flooring to condense and expand while the toe-kick hides the gap.
Caution
Before I wrap things up, I must warn you to exercise caution. Kitchen islands are very heavy and will stress out your laminate floor. Never work alone. Have at least one additional person ready to help you move and lift the island. Furthermore, I highly recommend driving the island with a dolly. Dragging or pushing the island against the laminate floor will scratch and pin down the flooring. A dolly reduces the direct impact on the floor and makes transport a breeze.
Final Thoughts
In short, it is possible to install a kitchen island on a laminate floor as long as you respect the malleable properties of the surface but this is not ideal. Laminate flooring floats over the subfloor and is subject to change shape. Since the flooring locks pieces together, excess weight or tight packing will buckle and pinch the floor. Therefore, provide room between the cabinet and the flooring by utilizing tools like filler pieces, flooring blocks, and toe-kicks. You can cover any gaps with trim later on.
Recommended Reading:
Best Rooms For Carpeting: A Room-By-Room Guide
As a homeowner, I am constantly experimenting with making the structure of my house more energy-efficient, eliminating pests, and taking on DIY home improvement projects. Over the past two decades, my family has rehabbed houses and contracted new home builds and I’ve learned a lot along the way. I share my hard-learned lessons so that you can save time and money by not repeating my mistakes.