

Replacing windows is a significant investment. In fact, according to Remodeling’s 2017 Cost vs Value Report, the average homeowner can expect to recoup approximately 73-74% of their window replacement costs in resale value. However, you may want your replacement windows to stay within budget and not require any additional work during the installation process, which may mean not replacing the trim.
You can replace windows without replacing the trim. This is ideal if the trim, siding, and casing are in good condition. However, if any of these is damaged or rotten, you will need to replace the trim.
Read on for more information on when to install new trim and the steps to follow when you need to replace your windows without replacing the trim.
How To Install a Window Without Replacing the Trim
Here are the tools you’ll likely need:
- Replacement window
- Caulk
- Hammer
- Finishing nails
- Screwdriver
- Safety goggles
- Exterior wood insert
- Shims
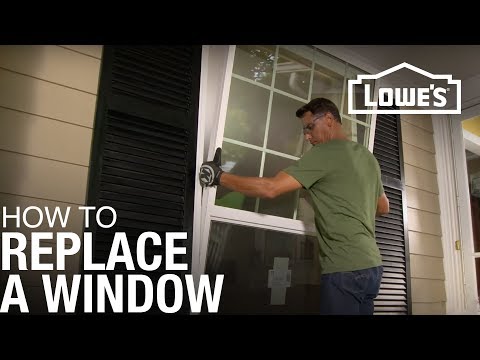
Before we start, I recommend watching this short video from Lowes that outlines the process:
1. Check if the New Window Fits the Opening
To install a replacement window without replacing the trim, you’ll need to buy a window that’s smaller than your own. Start by measuring the width and height of the window frame. Then go shopping for a window that is ¼-inch smaller in both dimensions, as this blog post by DIY Network recommends.
2. Remove the Current Window
Make sure the window is unlocked, and check around the edges of the frame for any screws or nails. Use a hammer to pull out any nails or screws, and use a pry bar to lift the window.
If you have sashes on your window (inner frames that slide up and down), remove them now.
3. Add Caulk and Check for Square
Add caulk around the opening where the new window will fit. You’ll likely need to use a ladder to reach the top and the bottom of the opening. Then check for the square by measuring diagonally from corner to corner on both sides.
If they’re the same, you’re all set.
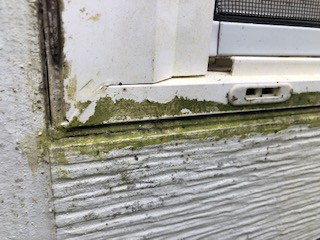
Pro tip – make sure you are using a mildew-resistant caulk. If you don’t, you’ll end up with a mess like this:
4. Add Shims and Insulating Foam
If the diagonal measurements are different, you’ll need to add shims between the exterior walls and the new window. Purchase insulation foam at a home improvement store.
It’s made of polystyrene beads that expand to fill gaps and is safe for the environment.
5. Nail Siding Inserts Into the Siding and Trim
Use a hammer to attach the window insert into the siding and trim, ensuring it fits flush against the house. Fill gaps with insulation foam as necessary.
If you need to remove dried paint from the exterior of your home, use Citristrip, a safe and easy-to-use paint stripper that has no harsh fumes or acids that’s found on Amazon.com.
6. Install and Caulk Replacement Window
Install and caulk the replacement window into the opening, following manufacturer instructions for your specific window type. Ensure you check around all edges to ensure there are no gaps between the frame and the siding.
7. Attach Interior Sashes With Screws
Reattach interior sashes with screws, being careful to measure them correctly. If you get the measurements wrong, they’re likely to be off by more than ¼-inch, which is too much for shims. The window will not fit properly if the sashes are attached incorrectly.
8. Clean Up the Exterior Trim
Once all of the insides of windows are reattached, use a putty knife to scrape off any dried paint that may still be sticking to the exterior siding. Use paint thinner if necessary. Once you’re satisfied with the clean-up job, you can decorate your new replacement window without having to worry about painting it later.
When Is a Pocket Frame Install Necessary?
Not all replacement window installations require the removal of the existing window trim. Installing a pocket window is a process that allows you to install a new window without removing
the current interior and exterior trim, siding, or house wrap.
In general, a pocket frame install is necessary if the siding, trim, and casing are in good shape. This is because these structures will firmly hold the new window in place.
However, if the existing trim is warped or rotting away due to moisture intrusion, it may not hold the structure to the house, so you will need to install a new trim when replacing the window.
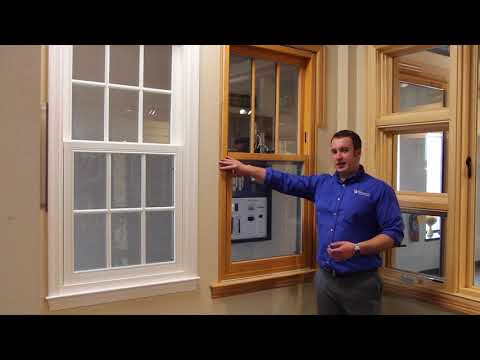
Pocket Frame vs. Full Frame Installation: Key Differences
Now that you have learned how to replace windows without replacing the trim, it’s time to explore the difference between Pocket frame and Full Frame installations.
Pocket Frame
This type of window installation takes place between existing studs. The space is cut out, and a new “pocket” is added to the side of the wall. Then a window unit is installed within this pocket.
Pocket frame installation is a common way of replacing windows without the need to replace the trim. It is typically less expensive than a full-frame installation and requires less time to complete.
Full Frame
This form of installation is much more involved. It requires removing existing studs and then reattaching them to the exterior wall with new siding.
This type of installation is necessary when you are replacing larger windows or are entirely rebuilding your home’s structure due to damage from weather, termites, fire, and other problems.
Here’s a video that demonstrates the differences between a pocket frame and full-frame window replacement:
When Do You Need To Replace the Window Trim?
The basic rule of thumb is that if your window’s wooden trim, exterior siding, and walls are still in relatively good condition and you’re just replacing the window unit inside of it, then pocket frame installation will do the trick.
Generally, experts recommend replacing the window trim if you notice any rot, rotten wood, cracks, or other structural damage around the frame of your windows. In such cases, you will need to frame out the entire opening or install a full replacement window.
Conclusion
Replacing windows doesn’t have to be expensive. Through the use of pocket frame installations, you can have new windows without having to replace the trim or put in a full replacement window.
Pocket frame installation is easier for contractors and homeowners alike.
As long as the wooden trim, siding, and walls are in relatively good condition, pocket frame installation will do the trick. If you notice any rot, rotten wood, cracks, or other structural damage around your windows, it is time to replace the exterior trim and put in a full replacement window.
Recommended Reading:
- Drafty Windows In Apartment? Do This And Save Money!
- How to Frame a Window: Step by Step Guide to New Installs
- Is It Worth Insulating an Old House? Here’s How To Decide
As a homeowner, I am constantly experimenting with making the structure of my house more energy-efficient, eliminating pests, and taking on DIY home improvement projects. Over the past two decades, my family has rehabbed houses and contracted new home builds and I’ve learned a lot along the way. I share my hard-learned lessons so that you can save time and money by not repeating my mistakes.