
Caulk can help provide a seamless finish between the baseboards and the wall, but which comes first in your home decorating project? Do you paint, then caulk to achieve a sharp line, or caulk, then paint to help blend the baseboard into the wall?
You usually caulk baseboards before painting to achieve the best possible finish, especially if a caulk line is in a visible spot. Apply caulk after priming both wall and baseboard but before the final paint coats to either. Use painter’s tape to get that professional edge once the caulk has dried.
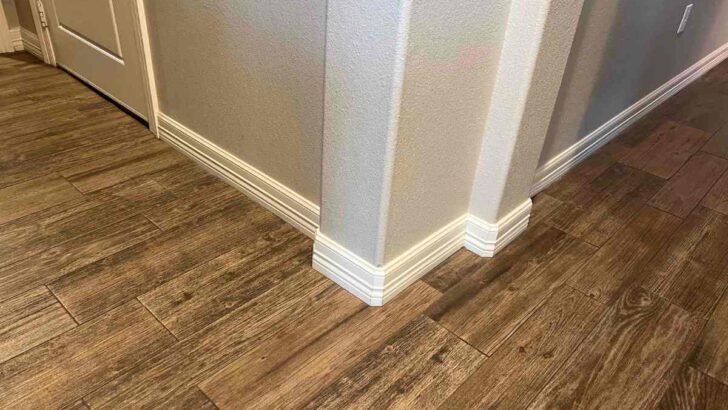
Baseboards in entryways or under windows will always catch the eye, so you’ll want to aim for the best finish possible. Here’s a guide on how to achieve that in your home.
Why Do We Need To Use Caulk?
Baseboards rarely sit back completely flush with your walls. Even on new drywall, there will be gaps where the boards aren’t flat, or the baseboards might be bent. Closing up these gaps can contribute toward maintaining a property’s air seal, helping save energy.
Even when there are no gaps in some sections, I still like to see a small bead of caulk softening the transition between the baseboard and the wall.
I find that caulk helps me define that transition better with a paintbrush and decorator’s tape. Caulk can cover the gaps between the baseboard and the wall so that you can judge with your eye where to paint, making it look right rather than letting the paint line follow the deviations.
Use a good-quality decorator’s painting tape like Scotch Blue (link to Amazon) to help get a nicely defined line between the baseboard and the wall.
I find it much easier to get that good solid clear line between the two by painting down to the top of the baseboard rather than painting the baseboard after.
How To Easily Caulk Your Baseboards
Applying caulk to your baseboards is a straightforward, easy job to help you finish your home decorating project professionally.
As always, preparation is key to preventing your paint job from looking poorly done. Make sure the baseboards are clean and dry. And if you’ve been filling and sanding, there will be plenty of dust and debris to clean up.
A vacuum cleaner will do a great job cleaning up dust, but wiping down the baseboards with a damp cloth will remove the most stubborn debris.
Cutting the Caulk Nozzle
I like to keep my nozzle narrow and use light pressure on the lever of the caulking gun to keep a steady, slow flow. In my years of experience, it’s always better to take your time and apply less caulk than is needed at first.
An average 12 x 12 foot (3.66 x 3.66 m) bedroom should only take 10 minutes for each side of the room, and with two passes, you should have it done within an hour.
Adding a little more where required is easy, but it’s much harder to clean off excess material.
Even if some of the gaps behind the baseboards are quite large, say more than 3/16 inches (4.76 mm), don’t be tempted to fill it in one pass. Instead, cut the end of the nozzle to between 1/16 inches and 1/8 inches (1.59 mm and 3.18 mm) and make more than one pass.
Cut the end of the nozzle at a comfortable angle, say 60 to 45 degrees, as you’ll want to apply the caulk so that it’s pushed down into the gap at the top of the baseboard. Caulk is used as a filler, after all, and not to sit on top of the gap.
Getting the Best Finish With Caulking
Whichever way you plan to carry out the work, caulking is essential to ensuring you get the best finish possible in your home improvement project. You want to have the satisfaction that comes with a job well done.
For great results, I recommend removing the baseboards to finish them properly on the bench. Once cleaned up and reprimed, apply a single coat to the baseboards and then let them dry for at least 24 hours.
While they’re drying, I would usually finish and apply a first coat to the walls. Once the painted baseboard is fitted onto the primed and painted wall, it’s at this point that I would think about filling the gaps and fixing pinholes.
In new construction, it would typically be more straightforward, but I would still follow the same process, ensuring that the plaster or drywall was fully primed and had at least a primary paint coat before I would fit the baseboard.
Applying Filler Before Caulking
It’s essential that you fill any holes before you start caulking. Here’s how:
- Fill the pinholes with wood filler where the baseboard has been fixed to the wall.
- Fill the pinholes in any trim and all the moldings around doors and windows.
- Let the filled areas dry, then sand them off.
- Vacuum the moldings and baseboard thoroughly.
- Wipe with a disinfectant wipe or a microfibre cloth, as they leave nothing behind. Don’t forget to do this part of the process because dust and debris can get swept up into your caulk, and you may very well end up with a lumpy joint.
Once you’re happy that the filled areas are clean, you can begin putting in as little caulk as you can get away with. Remember to let off the pressure so you get as little waste as possible, and draw the tube of caulk toward you in a nice smooth action.
Cleaning Up and Letting Caulk Dry
Use a plastic profiling tool to clean up the excess caulk or your moistened fingertip to push the caulk down into the gap at the top of the baseboard.
Additionally, give the caulked baseboards time to dry out. Most caulk, such as this DAP Caulk (link to Amazon), is good to go after 24 hours. But if you don’t have the luxury of time, this White Lightning Caulk (link to Amazon) dries within 20 minutes, making it paintable nice and quickly, so you can get in and get out again without delay.
Conclusion
If you want the very best finish to your baseboards, then running a caulk joint on top of your baseboards before the final coat of paint will help you achieve this. Caulk will help disguise any irregularities in the wall or baseboard.
On the other hand, applying caulk after painting will only highlight any discrepancies. However, it might be essential should the original filler shrink over time (you can easily rectify this by applying a small amount of caulk to the affected area).
Recommended Reading:


Simon Kellow is a master carpenter with over thirty-five years of experience in carrying out home renovations while running construction projects large and small. When he’s not in the office or fixing something in the workshop you can find him enjoying the great outdoors with his family.