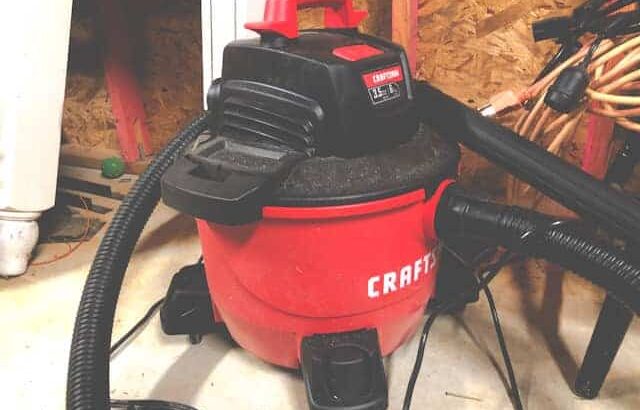
My neighbor’s old shop-vac was blowing dust out just as quickly as it sucked it in and he was downright frustrated. This is a fairly common mishap with shop-vacs and typically an easy one to address.
The trick here is finding the reason that stuff is blowing out. Read on to learn how to look over your shop-vac, find the root cause of the problem, and address the issue.
Vac Is on the Wrong Setting
Before getting into the more detailed causes for your shop-vac’s malfunctioning, first make sure that your shop-vac is on the appropriate setting. While not all shop-vacs have a dual function, some give you the option to either blow air out or suck air in, and thus all of the particles and debris with it.
If on the wrong setting, it can seem as though something is wrong with the shop-vac itself as particles begin to fly around. Just be sure to first check to make sure you have the shop-vac on the appropriate setting before moving on to other possible causes.
Collection Drum is Full
As with any vacuum, if the bag or container is full, you will not only lose suction but it is also more likely that you will start blowing dust back into the air. Make sure to frequently empty your shop-vac’s collection drum and wipe out any leftover dust that sticks to the sides if you are not using a collection bag.
Attach a Collection Bag
While you do not need to have a collection bag for a shop-vac, especially if you are dealing with larger debris, it will prevent greater amounts of dust that the filter is unable to catch from flying back into your room. That also means less cleaning in general in the long run.
Bags are easy to remove and maneuver when dumping debris into the trash bin. Your filter will also stay cleaner longer if the particles are immediately trapped while vacuuming instead of swirling around in the collection bin and leaving behind residue that can accumulate over time.
A typical 2-piece set of shop-vac collection bags will cost around $20. Follow these instructions for installing a collection bag onto your shop-vac:
- Unplug your shop-vac.
- Remove the shop-vac cover.
- Unfold the collection bag and form a circle to match the rim shape of the collection drum. Do not try to inflate.
- Place the cardboard hole over the intake spout and pop it into place. On some shop-vacs you may need to remove the intake spout altogether and slide in the intake tube gently through the cardboard opening to secure it in place.
- Replace the shop-vac cover.
Pro Tip: If you don’t have a collection bag you can usually put an inch or so of water in the basin of the shop vac. This will catch the majority of the dust as it enters and keep it from blowing out.
Hole in Filter
Shop-vacs are made with heavy-duty use in mind, but they may only be as tough as their filter. All filters will have a similar lifespan and if pushed past their limits they may develop tears or holes where debris can pass straight through (source).
How long your filter stays intact will depend on the frequency of use and what your vac picks up.
In the case of a hole or tear, it is best to purchase an entirely new filter which will cost around $20 for most standard shop-vacs. For a quick replacement, follow these straightforward steps:
- Unplug your shop-vac. This will do away with any threat of shock and ensure that your vacuum does not turn on mid-replacement.
- Remove the shop-vac cover. Unlatch the plastic shop-vac lid from the bottom collection drum and pull out the top piece which will have the filter attached.
- Remove the filter. Grab hold of the plastic filter tabs located to either side and pull up while pushing down on the fixed center cage.
- Insert the new filter. Place the filter over the fixed center cage, line up the hole, and press down until the filter clicks into place. You may need to press down firmer on the center to get the top to latch on.
Dirty Filter
Although replacing your filter in its entirety would be fairly cheap, filters can be easily cleaned with water. This is also a great opportunity to check for holes or tears if the dust is too thick to see any damage.


To clean, follow these six steps:
- Unplug your shop-vac.
- Remove the shop-vac cover.
- Remove the filter.
- Shake out the filter into a collection bin or trash can. Note that this part can get messy and will be best done outside or in a place with better air circulation.
- Spray your filter with water. This can be done with a hose, but be sure that the pressure is not too strong to the point where it will tear the filter.
- Let the filter dry before replacing. Do not let the filter sit out too long under the sun, as sun damage and other elements can weaken the filter lining over time.
It can also be helpful to shake out your filter after heavy usage. The entire process of removing and replacing the filter can take only one minute with practice and can be done each time you empty the collection bin.
Filter Improperly Installed
One of the issues we found when we took apart my neighbor’s shop-vac was that his filter had actually fallen into the basin. He’d bought the wrong size and instead of returning it, he just put it on and forgot about it.
To check for this issue and readjust your filter, follow these steps:
- Unplug your shop-vac.
- Remove the shop-vac cover.
- Pop-out the filter and proceed to reinstall. Make sure to lineup the center filter hole with the filter cage poll and check that all areas are snapping easily and evenly into place.
Pro Tip: If you are using a foam sleeve filter and it is not staying in place, you can wrap a couple of rubber bands around it to keep it snug. Works like a charm!
Use a High-Grade Filter
Depending on the type of dust and debris your shop-vac is sucking up, you may need a higher-grade filter to block all of the particles. Most standard shop-vac filters will be up for any task, but particles that are imperceptible to the human eye can escape through, flinging things like dander and pollen right back into the air.
The typical filter for a shop-vac is a V4000. While the next level up, a VF5000, will block the majority of small particulates from flying back into the air, a VF6000, or HEPA (high-efficiency particulate air filter) which will cost about $30, or $10 more than the standard filter, will best the best option for capturing the greatest amount of dust.
Follow these instructions for easy installation:
- Unplug your shop-vac.
- Remove the shop-vac cover.
- Remove the filter.
- Insert the new filter.
Even though you may not need a higher quality filter for the materials you typically need to vacuum up, if you use a filter like the VF6000 it will improve the overall air quality of the space you are working in since all shop-vacs will end up blowing dust back into the air, especially if their filters are lower grade.
Pro Tip: High grade filters cost more but you can make them last longer with a filter retainer cover (link to Amazon). It helps to cut down on dust while prolonging the life of your filter. Sort of like putting a sock over it.
Conclusion
Dust blowing out the back of your shop vac can make you want to throw it out the window but the issue is almost always fixable. If you are in a pinch, put an inch of water in the bottom of the wet/dry vac basin and see if that does the trick.
If not, these tips should help you to troubleshoot your way through it.
As a homeowner, I am constantly experimenting with making the structure of my house more energy-efficient, eliminating pests, and taking on DIY home improvement projects. Over the past two decades, my family has rehabbed houses and contracted new home builds and I’ve learned a lot along the way. I share my hard-learned lessons so that you can save time and money by not repeating my mistakes.
Leave a comment
You must be logged in to post a comment.