Why Are Your Lights Dimming and Brightening? 5 Fixes
It’s dinnertime at your house, and you’re hosting a large company of people on this special occasion. Everyone is having a pleasant time – that is until suddenly, your lights flicker. When lighting dims or brightens suddenly, it’s annoying, regardless of when it happens, and unfortunately, this is quite a common problem we face with artificial lighting.
Reasons for your lights dimming and brightening include faulty wiring or ballasts, circuit overloads, or power grid issues. Or, it could simply be that your lights are old. Luckily, other than issues with the power grid, everything can be easily fixed.
Throughout this article, we’ll examine some common causes of flickering lights and how you can fix them.
Reasons Your Lights Dim and Brighten
Lights can dim and brighten for several reasons, and before you can fix the problem, you must identify its cause. Below are the main reasons why your lights are dimming and brightening.
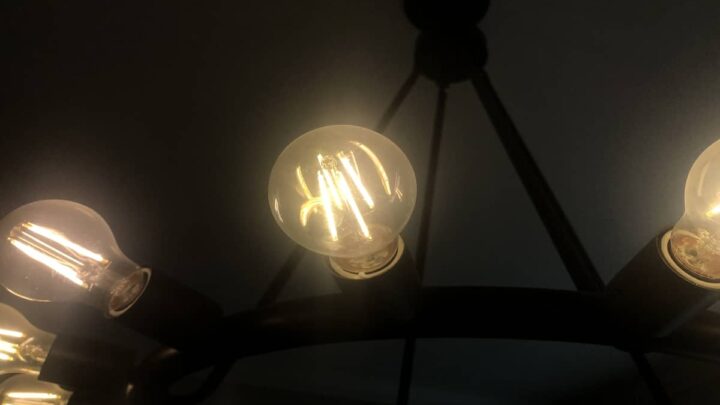
Old Light Bulb
Bulb and lamp life hours indicate how long a bulb will last through use. It could be for a couple of hours, say 750 to 2000. After its stated lifespan, a light bulb will only put out 70% of the light that it did before or more. Different components wear out differently as bulbs age, causing the lights to dim or flicker (source).
Faulty Wiring
Your lights could also dim unexpectedly if the wiring in your home is old or not strong enough to handle the amount of current it uses. These older homes are not built to serve today’s modern households, which typically feature many devices and appliances that use large amounts of electricity (source).
Faulty Ballasts
In addition to keeping lamps in place, ballasts supply them with the appropriate amount of electricity at the optimal voltage frequency. Some lamps also require special startup conditions, which are often regulated by ballasts. However, this regulation may malfunction as ballasts age. Consequently, voltage or current levels can fluctuate, resulting in too bright or dim lights.
Circuit Overloads
If your lights dim when you turn on your air conditioner, clothes dryer, or microwave, you most likely have a circuit problem on hand. Almost every home electrical circuit has a maximum power draw.
More devices connected to one circuit would create more power usage. To balance this out, the current flowing through your lights will decrease, causing lights to dim (source).
Power Grid Issues
There may have been a transformer failure or an interruption in power coming to your house. Storms often cause such problems. There is less likelihood of brownouts (general dim lighting) than blackouts, but they can happen if there is a citywide power shortage or an unusually high energy demand.
5 Fixes for Dimming and Brightening Lights
Whenever your lights brighten, too much energy is being received. Likewise, when they dim, too little energy is being received. You may end up receiving too much or too little power and further damage your electrical devices if this problem becomes worse.
To keep this problem from getting worse, try any of the following five fixes.
1. Change the Light Bulb
If the lights are dimming and brightening because of an old light bulb, then replacing the light bulb will solve the issue. Always be sure to check the bulbs in your light fixture before doing anything else. More often than not, this simple problem is the reason for your troubles.
2. Upgrade the Wiring
If your lights only flicker because you turned on heavy appliances, like the air conditioner, this could be due to fault wiring. You might want to look into a service upgrading your house for such equipment by having it re-wired.
3. Replace Faulty Light Switches
When the light switches are faulty, they can result in flickering lights. This brightening and dimming are because the faulty light switches may not connect with the bulb. The best thing to do is to replace the defective light switches with the help of an electrician.
4. Wait Out a Brownout
At times, the cause of dimming and flickering lights is brownouts. Your electricity provider must have deliberately reduced the supply to prevent a total blackout, probably because of bad weather. Unfortunately, all you can do is wait out the brownout, have a flashlight on hand, and unplug devices to avoid them getting damaged by the low voltage.
5. Replace the Light Fixture
Sometimes, taking out the whole light fixture might be in order if you’ve tried everything else. This replacement can be done by a professional. However, if you’d like to take up the challenge, here are some detailed steps on how to install a new light fixture “DIY style.” (source)
How To Replace Your Light Fixture
If you’d rather not hire an electrician or are more of a DIYer, here’s a step-by-step on how to install a new light fixture yourself:
- Find the breaker box for the room where you’ll be working. Then shut off the breaker there.
- Remove the globe or cover of the fixture. It will reveal the mounting screws that hold it to the ceiling box.
- Disconnect the fixture from the hanging box by loosening the screws. Exposed wiring should now be visible.
- Check the circuit wiring for voltage using a non-contact voltage tester. Upon verifying that the power has been turned off, disconnect the circuit wires from the light fixture wiring.
- Attach the new fixture’s neutral lead to the neutral circuit wire with a wire nut (wire connector). It’s usually white. This process is sometimes a bit of a balancing act. Therefore, you might need some assistance.
- Connect the black (hot) fixture lead to the hot circuit wire. You should use a wire connector for this step.
- Connect the grounding lead on the new fixture to the circuit grounding system. The fixture’s grounding lead may be a green insulated wire or bare copper wire, while the circuit grounding wire is usually bare copper.
- Fix the fixture base to the ceiling box. Then fold the wires into the electrical box and push the fixture up toward the ceiling. Screw the mounting screws tightly into the corresponding holes in the mounting strap.
- Replace the light bulbs. Choose bulbs that do not exceed the light fixture’s maximum wattage rating. Attach the globe or glass cover to the fixture.
- Turn the breaker to the on position to restore power to the light fixture. Then test it to ensure it is working correctly.
Conclusion
Most dim lighting problems are electrical (and do not stem from the bulb itself), and an electrician will need to be contacted.
Nevertheless, knowing what the issue is before scheduling an appointment will save you both time and money.
Recommended Reading:
- Fan Tripping Breaker – A Complete Guide to Issues and Fixes
- How Is Energy Wasted At Home?
- Why Is My Electric Bill So High? Here’s The Answer!
As a homeowner, I am constantly experimenting with making the structure of my house more energy-efficient, eliminating pests, and taking on DIY home improvement projects. Over the past two decades, my family has rehabbed houses and contracted new home builds and I’ve learned a lot along the way. I share my hard-learned lessons so that you can save time and money by not repeating my mistakes.