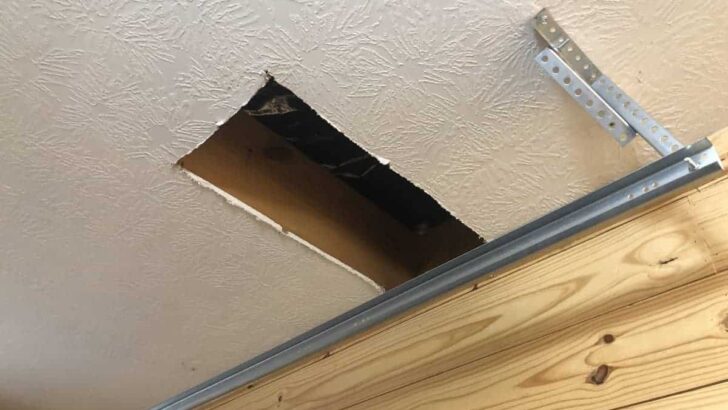

You want to finish your attic, but first, you need to make the opening big enough for the stairs. You have some home renovating experience, but you’ve never done a job like this before. How do you enlarge an attic opening?
Here are 7 tips and tricks that will help you enlarge your attic opening:
- Check for pipes, wires, and HVAC ducts.
- Make sure your roof has rafters, not trusses.
- Measure and mark joists and ceiling.
- Get a reciprocating saw.
- Put temporary support on the joists.
- Cut the beams and install the headers.
- Install trimmers to frame your opening.
If you’re tired of crawling through a cubbyhole from a stepladder, don’t despair! When you’re done with this article, you’ll know how to turn that tiny crawl space into a gateway to a new and better attic!
1. Check for Pipes, Wires, and HVAC Ducts
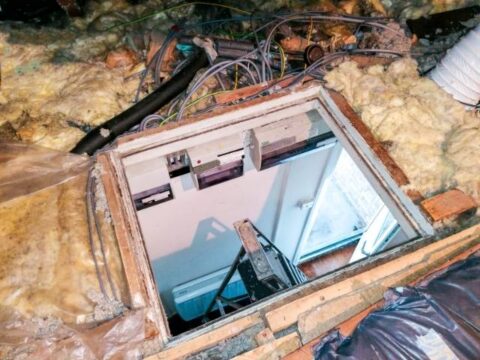
Clear out any insulation covering the space where you are expanding the opening. Make sure there are no pipes, wires, or HVAC ducts in the area to be cleared. If you find any items that you cannot move aside, consult a professional to see if they can reroute them.
Alternatively, check to see if you can enlarge the opening in a different direction. Should this be impossible, you may have to close up your current attic opening and create a larger one from a more suitable location within your house.
2. Make Sure Your Roof Has Rafters, Not Trusses
Traditionally carpenters built roofs using 2×10 or 2×12 wooden beams (rafters) and ceiling joists that secure the rafters to the load-bearing exterior walls. If your roof has rafters, most of its weight is borne by the outside walls, though you still should avoid cutting the purlins, which further distribute the roof’s weight atop interior walls (source).
Today most residential roofs are made with trusses, premade wooden buttresses that distribute the roof’s weight load differently than rafters. Cutting into a truss could lead to sagging or, in the worst case, catastrophic roof failure. If you have a truss roof, you need to speak with a licensed contractor or a structural engineer before making any attic modifications.
3. Measure and Mark Joists and Ceiling
In the attic, measure and mark your expanded opening. Now add 4 inches (10.16 cm) on either side of the joist that you will be cutting. You will brace the cut joist on each end with two boards that are each as large as the cut joist.
Since joists are generally 2 inches (5.08 cm) thick, we leave a 4-inch (10.16-cm) allowance on each side. If your new opening requires you to cut through more than two joists, consult a structural engineer to ensure that you are not at risk of a sagging ceiling or swayback roof. On the ceiling, trace out the outline of the new opening.
4. Get a Reciprocating Saw
Enlarging an attic opening will require sawing on the horizontal in an enclosed space. A reciprocating saw (sometimes called a “Sawzall”) cuts in tight spaces and is used regularly by home improvement contractors.
If you do not own a reciprocating saw, the Dewalt DWE304 10-Amp Reciprocating Saw (link to Amazon) has enough power to saw through studs but not so much power that a DIYer will have difficulty controlling it. Dewalt’s DWE304 is a popular choice with both professional and amateur contractors.
5. Put Temporary Support on the Joists
Place a 1×4 beam about 18″ (45.7 cm) behind each line you have marked on the joists to be cut. The beam should also lie across the joists next to the board you are cutting. Attach the beam securely to the marked joist and the adjacent joists.
This beam will serve as temporary support for the joists until you put in your permanent bracing. Because you will want to remove it after you have finished the opening, you may want to use #8 2.5″ (6.3 cm) wood screws that can be removed more easily than nails (source).
6. Cut the Beams and Install the Headers
Measure the distance between the uncut joists, then cut four headers to that length. The boards used should be approximately the same size as the existing beams and, when cut, should fit snugly when laid perpendicular between the uncut joists.
Using the reciprocal saw, cut the marked joist at the points you measured earlier. Make sure the cut is clean and vertical.
Square one of the headers to the cut joist. Affix it with three nails to the cut joist and each of the uncut joists. Place a second header directly in front of the first, then nail it into place. Do this on the other side of the opening.
Available on Amazon.com, the Dewalt 20v Max XR Finish Nailer (link to Amazon) will drive 2″ to 3.5″ (5 cm to 8.8 cm) 16-gauge nails as deep as you need them. The Max XR Nailer is battery-powered, saving you the trouble of compressors or expensive gas cartridges.
7. Install Trimmers To Frame Your Opening
Now that the headers are installed, you need to provide a frame for the rough opening. Measure the distance between the headers, then cut boards to fit. Place these boards parallel to the joists at the edge of the new portal, then nail them to the headers. Using nails and glue, connect blocks every 10″ – 12″ (25 cm – 30 cm) between the trimming and the adjacent joists.
These trimming boards don’t need to be as thick as the headers: a single joist-sized board cut in two should serve the purpose. They are not shunting the roof’s weight like the double-thick headers, but if installed according to these directions, the trimming boards will support the weight of an attic ladder or folding staircase.

Key Takeaways
Now that you have easier attic access, there’s no telling what you might do next. You might create a new garret office, or you may just have an easier time getting Christmas decorations down for the holidays. At least you won’t be squeezing through an overtight attic entryway.
Enlarging an attic opening is not an especially complicated task, but it does involve working with weight-bearing beams. If you don’t feel up to the job, hire a competent contractor. The money you spend on professionals now may save you a lot of time, expense, and frustration later.
As a homeowner, I am constantly experimenting with making the structure of my house more energy-efficient, eliminating pests, and taking on DIY home improvement projects. Over the past two decades, my family has rehabbed houses and contracted new home builds and I’ve learned a lot along the way. I share my hard-learned lessons so that you can save time and money by not repeating my mistakes.