

Whether you’re hanging drywall in new construction or remodeling it’s important to know how far apart you should place the screws. This will ensure proper and sustained bracing for the sheetrock.
Drywall screws should typically be placed about 12 to 16 inches apart. However, the spacing changes when hanging drywall edges and ceilings.
The truth is, there are different answers for every type of drywall and how far apart the screws need to be on the wall from differing opinions to building codes.
With the right research, hanging drywall can be easy. You need to determine whether you want to use screws, nails, or adhesive. The numbers of screws and how far apart to space them depends on where you’re hanging the drywall.
Why Use Screws Over Nails or Adhesive?
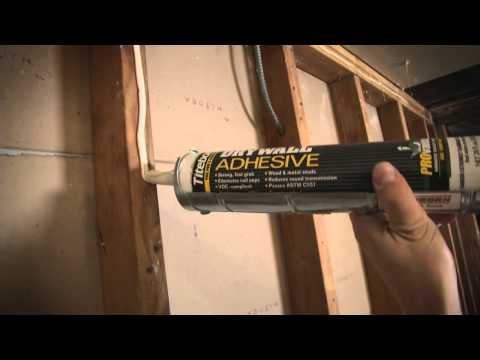
You can hang drywall with nails, screws, or adhesive. Because drywall is so thick and difficult to pierce, nails specific for drywall hanging have a large head with barbed spirals around the neck.
Drywall screws are the most secure way to attach drywall because they won’t come out as easily as nails or rip off like adhesive.
Nails tend to pop out, and you need to use a lot to keep everything in place. While adhesive tape bonds reasonably well – especially when putting new drywall over old drywall – it should always be reinforced with screws or nails.
Drywall screws stay in place more efficiently, meaning you don’t need to use as many.
Instead of using adhesive as a replacement for screws, consider using it to reinforce the drywall screws. They are useful to increase the strength between the panels and frame. You may also use fewer screws when adding adhesive, spacing them at a farther distance.
To use adhesive, you apply it to the stud before screwing on the drywall sheet. However, keep in mind that if you ever want to remove the drywall in the future, you will need to replace it entirely. Attempting to remove adhesive will damage the drywall, rendering it useless.
This YouTube video outlines the process. I’ve never used this or felt a need for it but there may be certain situations where it would be beneficial:
How to Hang Drywall to Metal Using Screws
Drywall screws are the most secure and efficient way to hang the drywall. They’re necessary to use when hanging drywall to metal. In addition, you need to use a special drywall screw tool (link to Amazon). It looks like a standard drill.
What’s really cool is when you combine it with a magazine attachment (link to Amazon) that allows the tool to auto-feed the screws. A huge timesaver for big jobs.
How Far Apart Should Drywall Nails be Placed?
You’ll need a lot of nails if you’re using them to hang the drywall. After installing the first nail, a second needs to be placed about two inches from it to keep the drywall in place and prevent it from popping. Each pair of two-inch-apart nails should be about six to eight inches apart.
How Far Apart Should Drywall Screws be Placed on Wall Edges?
While the consensus for plain, flat drywall is to spread screws apart 12 to 16 inches, the spacing differs when you’re working with drywall edges. On wall edges, you want to create a smooth seam for easing taping and mudding. If the panels don’t match up, it could spell trouble for smoothing out the mud.
Try to space the screws along the drywall’s edges tightly, but not too close that the edges will crumble. Screws in wall edges should be spaced about eight inches apart. You may need to use more screws.
How Far Apart Should Drywall Screws be Placed on Ceilings?
Hanging drywall on the ceiling can be a daunting task. It requires more screws because of the gravitational stress put on the wall.
On the ceiling edges, screws should be places about 7 or 8 inches apart. On the ceiling field, they can be spaced approximately 12 inches apart, but no more.
How to Hang Drywall
Before diving into the drywall hanging project, measure your working area. Make sure you have enough drywall to cover everything, including extra if you have to cut some or make mistakes. Make sure you have the following tools:
- Enough drywall for the entire area plus extra
- Measuring tape
- Drywall screws
- Drill and drywall bit
- Saw for cutting drywall
- Mud knives – four- and six-inch
- Drywall mud
- Drywall tape
Check Local Building Codes
Before starting your project, check if your state or local municipality requires licensed contractors or a permit to hang the drywall. Codes vary by location.
Some places require a certain number of screws or nails or an inspection after drywall is hung and before mudding begins. Some locations don’t have any regulations.
How Many Screws Will I Need?
The number of screws you’ll need depends on how much surface you plan on covering. You’ll typically use about 32 screws per 4×8 foot drywall sheet (four screws in the middle and six on each of the two sides).
Determine the number of drywall sheets you need by dividing the wall surface’s square footage by 32. Multiply the number of sheets by 32 to get the number of screws you’ll need.
What if I Don’t Have Enough Drywall Screws?
If you don’t think you have enough drywall screws for your surface, head out and buy more. Effectively hanging drywall is essential for a safe and secure project done well.
Not using enough screws or improperly hanging the drywall will lead to future cracking and tearing, resulting in unnecessary – and sometimes expensive – repairs.
Hang Ceiling Drywall First
If you’re hanging drywall on the ceiling, measure it out, then cut the drywall to the exact size. When placing the drywall, make sure the end of the piece sits in a joist or stud center.
Start drilling in the screws – you might need help to hold the drywall in place. The screws on the ceiling drywall should be about eight to 10 inches apart.
Using a drywall bit, drill the screws in place and into the drywall to mud it. Be cautious not to drill the screw through the drywall!
Cover the Walls
While measuring the walls, notate things like outlets, lights, etc. that need holes in the drywall. Mark exact measurements with the obstruction’s openings on the drywall. You can easily accomplish this by penciling in the marks, drilling holes around them, and cutting around with a saw.
As you hang the drywall on the wall, drill the screws into the wall studs, spacing them about 12 to 16 inches apart.
Keep in mind you don’t want to push the screws too far – just enough for seamless mudding. Always keep the screws spaced equally and straight down in a line. Don’t stagger them.
Once everything is in place, you can begin mudding the wall.
How to Mud the Walls
Mudding drywall is vital for a seamless texture for painting. Before mudding, ensure that each screw is placed beneath the drywall surface. Put a small amount of mud onto a mud knife and cover the screws. Use a six-inch knife to smooth out the mud and fill the crease.
Immediately after mudding, tape the drywall joints across mudded seams. Smooth the tape over with the larger mud knife. Repeat the mudding the next day to ensure the smoothest finish.
Conclusion
Drywall screws should be placed 12 to 16 inches apart, but the distance can vary. Place screws eight inches apart on edges and ceiling edges, and no more than 12 inches apart on the ceiling field.
Screws are the most secure and efficient way to hang drywall. While nails and adhesive are sufficient, they can cause some issues in the future.
Related Reading:
How Much Weight Can Drywall Hold? More Than What You Think!
As a homeowner, I am constantly experimenting with making the structure of my house more energy-efficient, eliminating pests, and taking on DIY home improvement projects. Over the past two decades, my family has rehabbed houses and contracted new home builds and I’ve learned a lot along the way. I share my hard-learned lessons so that you can save time and money by not repeating my mistakes.
Leave a comment
You must be logged in to post a comment.